Logger for monitoring Journey data
This section explains how to use Quickwork’s Logger.
Logger helps monitor the data outputs of triggers and actions throughout a Journey's execution.
This section explains how to use Quickwork’s Logger for the same. Consider this scenario: when a GitHub issue is created, a Slack notification needs to be sent to specific channels.
- If the issue's title includes Bug, send the notification to the customer support channel on Slack.
- If the title contains Feature, send the message to the engineering channel.
A Logger is placed before the conditional branching to log the issue title, helping to verify the business logic.
✅ Pre-requisites
- Access to Quickwork for configuring trigger and actions.
- An active GitHub account with access to a repository where issues can be created and tracked.
- A Slack account with a configured Slack workspace and dedicated channels for customer support and engineering to receive notifications about GitHub issues.
Building the Journey using Logger
-
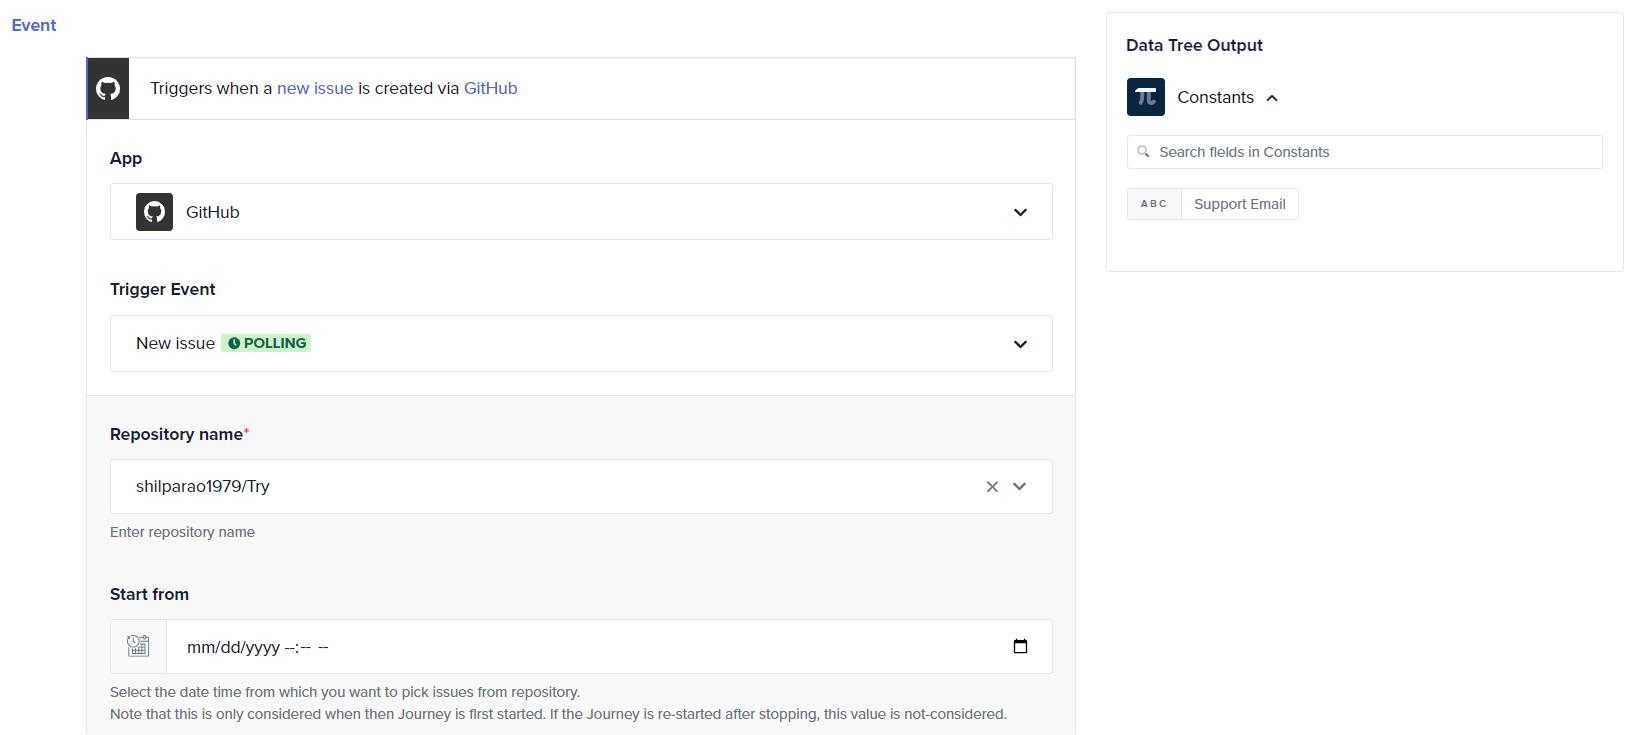
Set up the trigger:
- In Quickwork, go to the Journey configuration manager.
- Select GitHub as the app and choose the trigger event, such as New Issue.
- Connect your GitHub account by providing the necessary authorization.
- Select the Repository name from which you want to track issues.
-
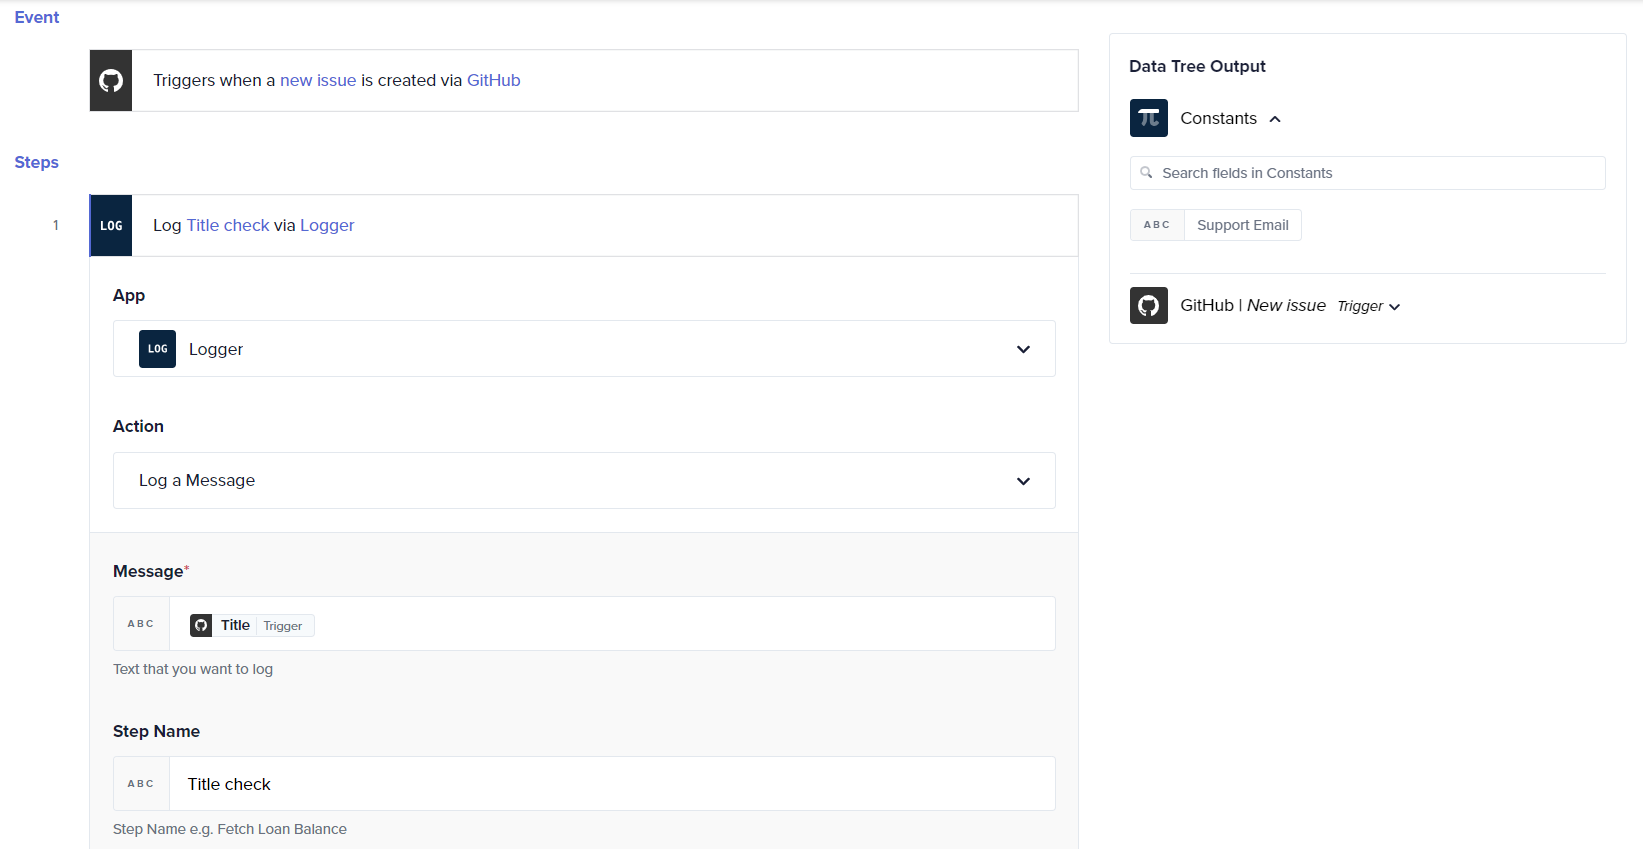
Configure Logger:
- Add a Logger action to record the issue details, mainly the title of the issue.
- Choose Logger from the apps list and select the action Log a Message.
- Drag and drop the Title data pill from the GitHub trigger output of the Data Tree Output to the Message input field. This step will log the title of the issue, helping to verify the content before applying conditions.
- Enter the Step Name.
-
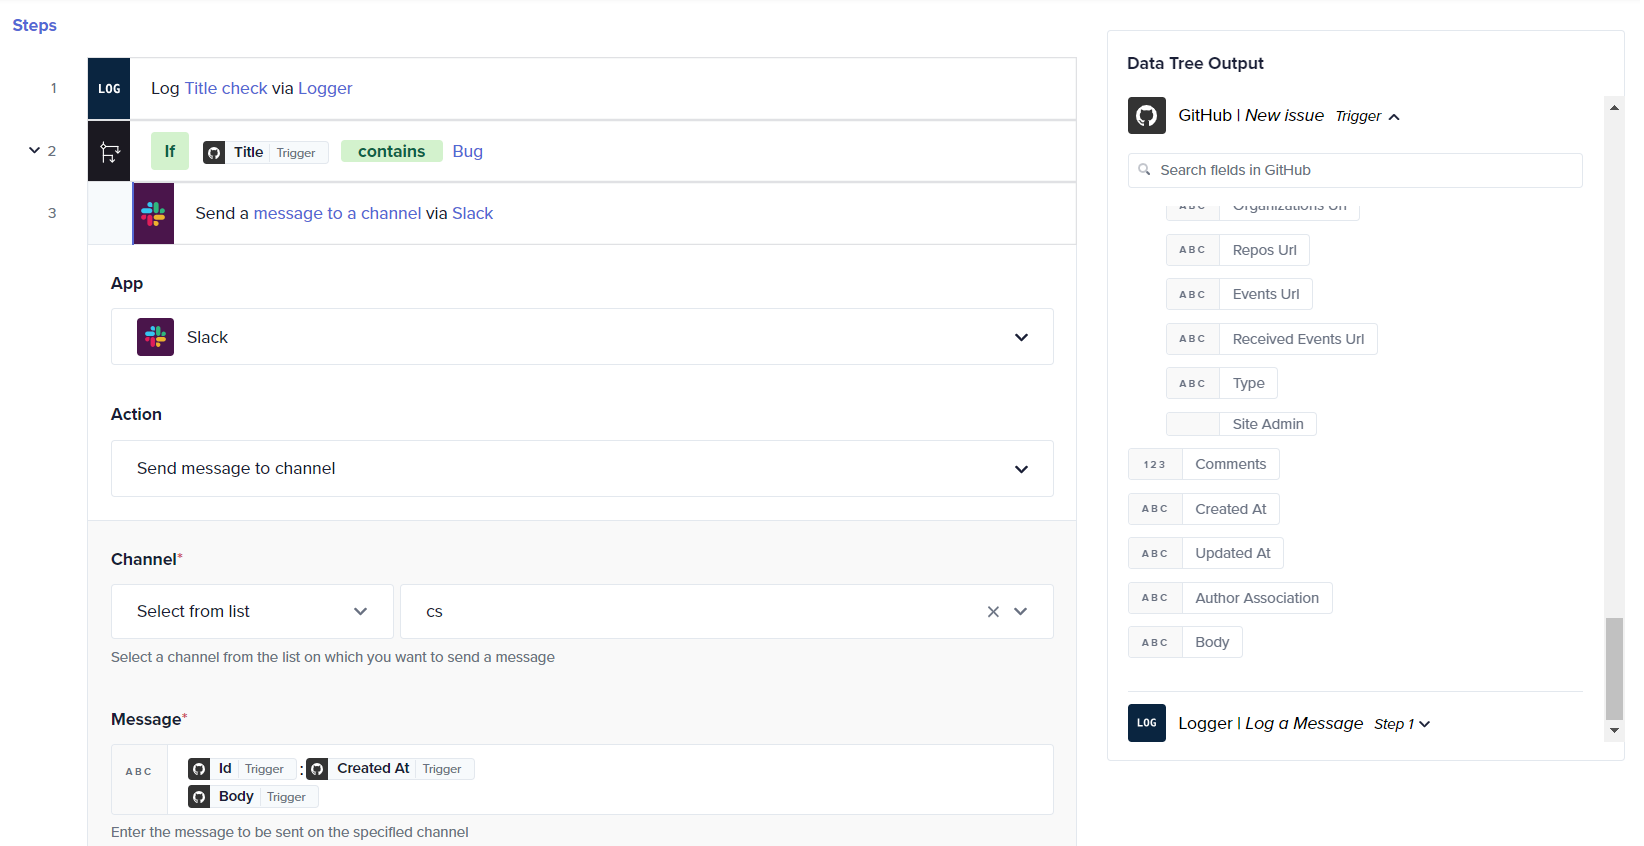
Set up If conditions:
-
If the Title contains Bug, proceed to one set of actions.
-
In the Steps section, navigate to Business Logic and select If Condition.
-
In the Left Value field, place the Title data pill from the Data Tree Output.
-
Set the Condition to Contains and enter Bug in the Right Value field.
- Select Slack as the app and choose the action Send Message.
- Connect your Slack account and choose the cs channel.
- Craft a message that includes a notification about the bug. Use the data pills from GitHub to personalize the message.
-
If the Title contains Feature, proceed to a different set of actions.
- Repeat the steps for Slack, choosing the engg channel instead.
- Set the message to notify about the new feature request and the need for evaluation.
-
-
Click Save & Start to activate the Journey.
Testing the Journey
- Activate the Journey and create a new issue in GitHub.
- Observe the loggedMessage in the History tab.
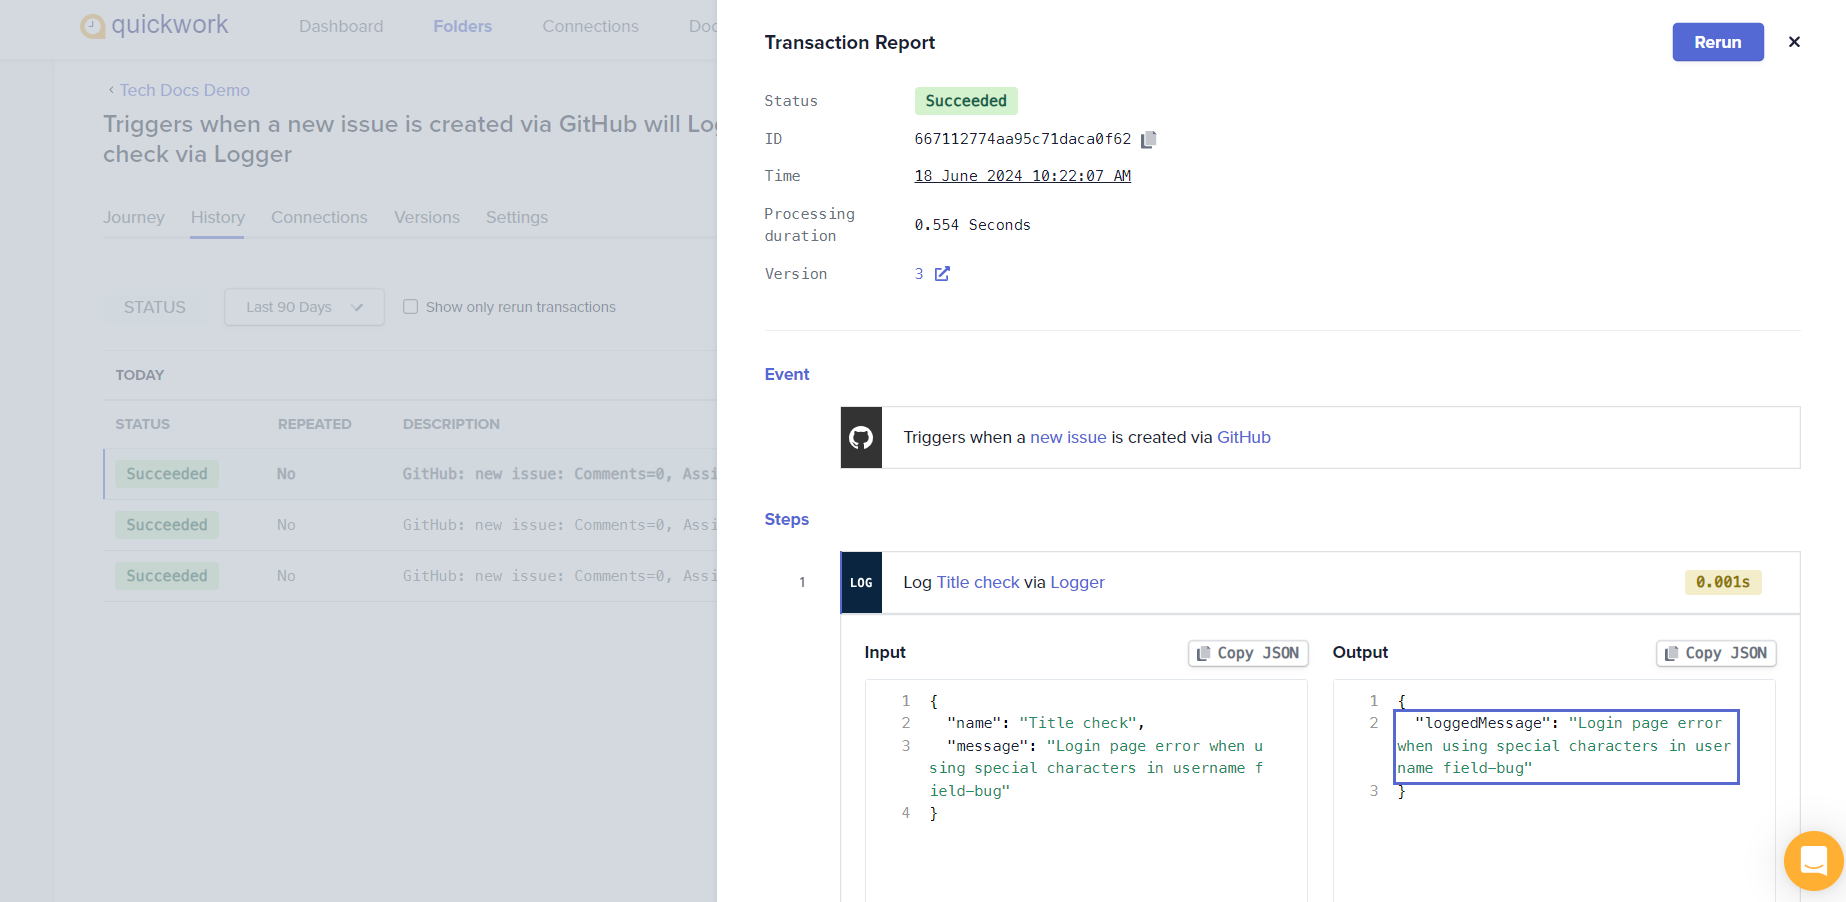
- Check the Slack messages.
Thus, the Logger app plays a crucial role in tracking the data outputs from triggers and actions. This visibility is crucial for debugging and ensuring data integrity between steps.
❓ Troubleshooting
- Check Logger outputs: If the Logger does not display the expected output, verify that the data pills dragged into the Logger action are correct and contain data.
- Conditional logic errors: If the Journey does not proceed as expected based on conditions, check the conditions set for case sensitivity and spelling. Ensure that the text matches exactly with what is expected in the GitHub issue titles.
✏️ Tips and recommendations
- Use Logger extensively during the development phase to log not just for specific fields but possibly the entire payload received from triggers and actions. This can help in understanding the full scope of data received and aid in refining the Journey steps.
- Use the Logger's Step Name field and comments in your Journey configurations to document what each Logger step is intended to do. This practice is helpful for maintenance or when the Journey configuration needs to be understood by new team members.