Team management
This section explains the Team feature within Quickwork.
The Team feature in Quickwork allows you to invite other users to collaborate within your account. Once a user accepts your invitation to join your team, they can access folders, Journeys, connections, history, and versions based on the roles you assign to them. This feature enhances productivity and problem-solving by enabling collaboration between team members and customers.
✅ Pre-requisites
- Access to Quickwork.
- Basic understanding of Quickwork terminologies and familiarity with Quickwork's GUI.
Accessing the Team feature
- Log into your Quickwork account.
- Navigate to Tools and select Team.
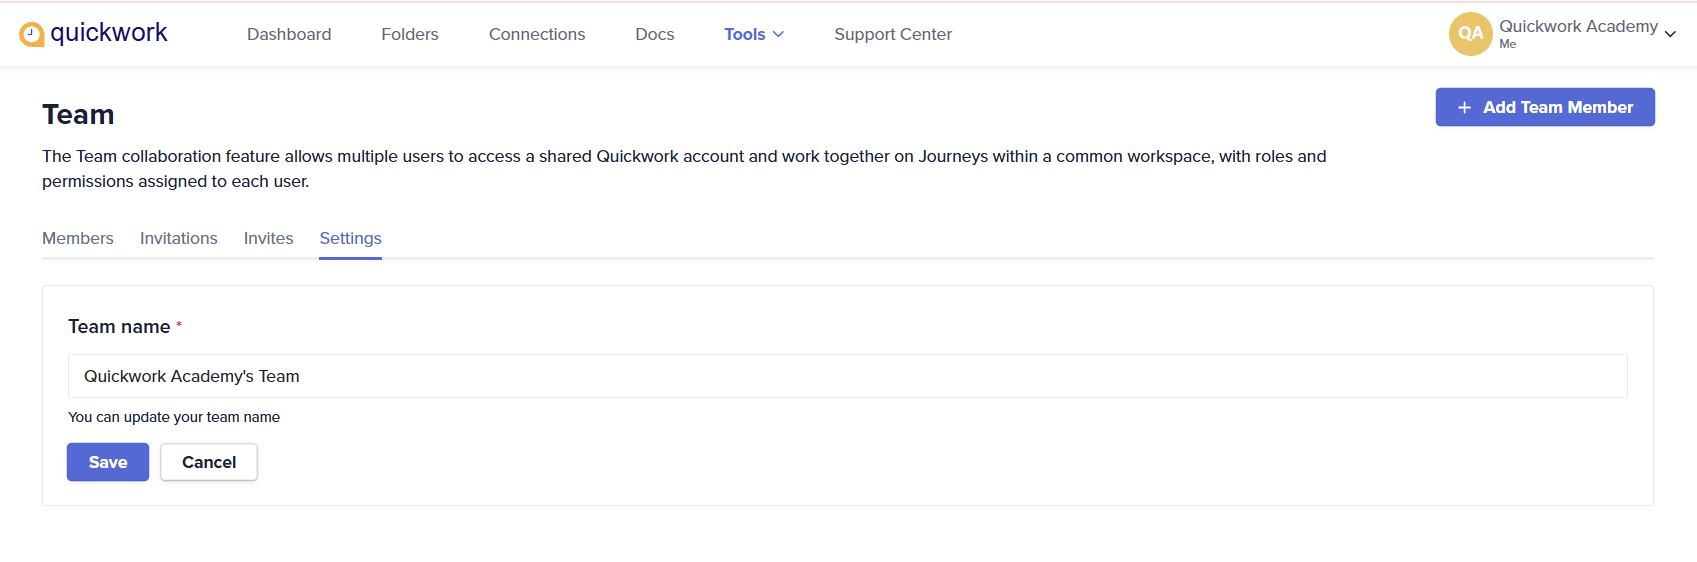
Creating a team
To create a team:
-
Click the Tools tab, then click Team.
-
Enter the Team name and click Create.
-
The team gets created, and you can view the Members, Invitations, Invites, and Settings tabs.
- Only one team can be created per account.
- Once created, a team cannot be deleted.
- A team can have any number of members added.
- A user can be a member of more than one team.
- Only the account owner can invite a member, edit roles, and delete a member.
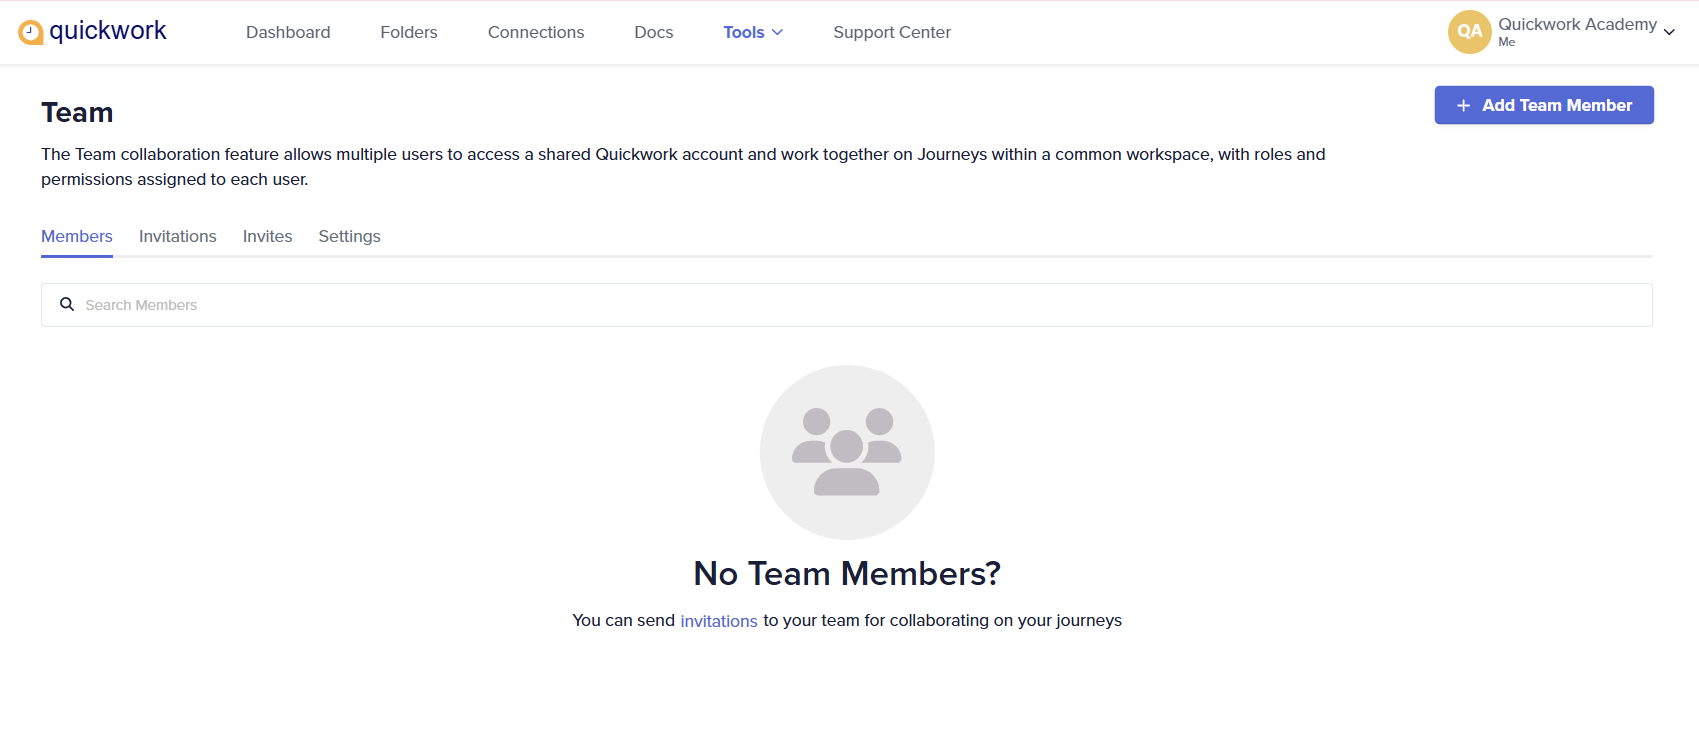
Adding members to the team
To add members to the newly created team:
-
Click the Members tab. Currently, no members have been added.
-
Click on the invitations link. The Send Invitation dialog box appears.
-
Enter the details: First Name, Last Name, and Email.
-
Select the role you want to assign to the team members (as explained below). For detailed information on what each role entails, users are advised to refer to the permissions table link, which provides a breakdown of the capabilities and limitations associated with each role.
-
Select the folders you want to give access to.
-
Click Submit.
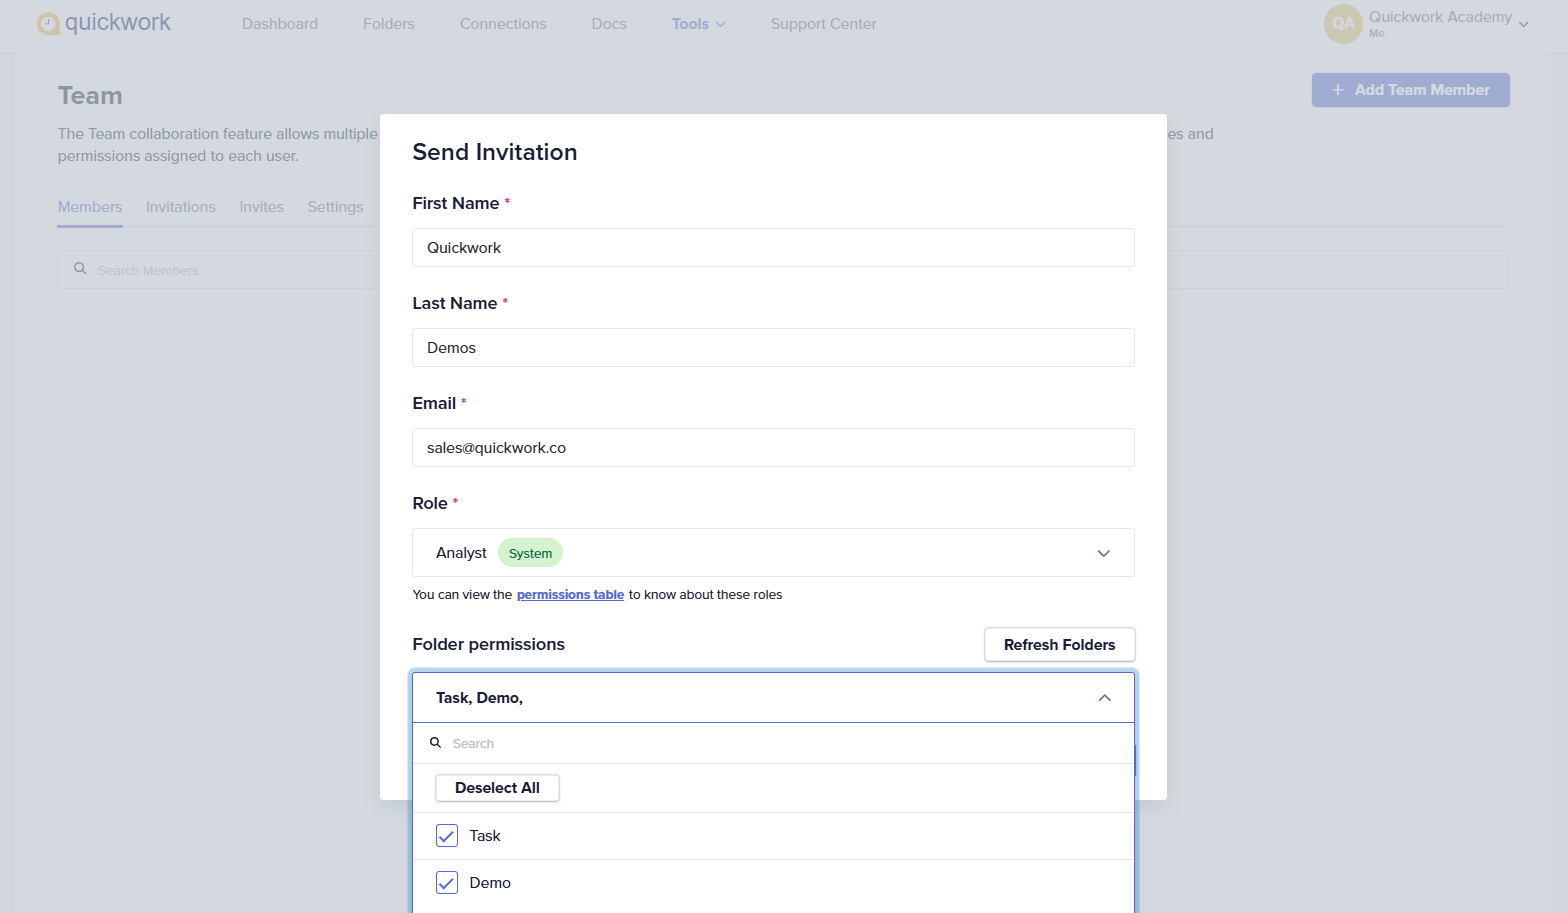
-
An invitation email is sent to the user.
Roles that can be assigned to a team member
Role determines what actions the member can perform, which areas of the platform they can access, and how they can interact with shared resources. The roles are predefined and includes options: Admin, Analyst, Moderator with different levels of access and control.
You can view these permissions by clicking on the permissions table link in the Send Invitation dialog box.
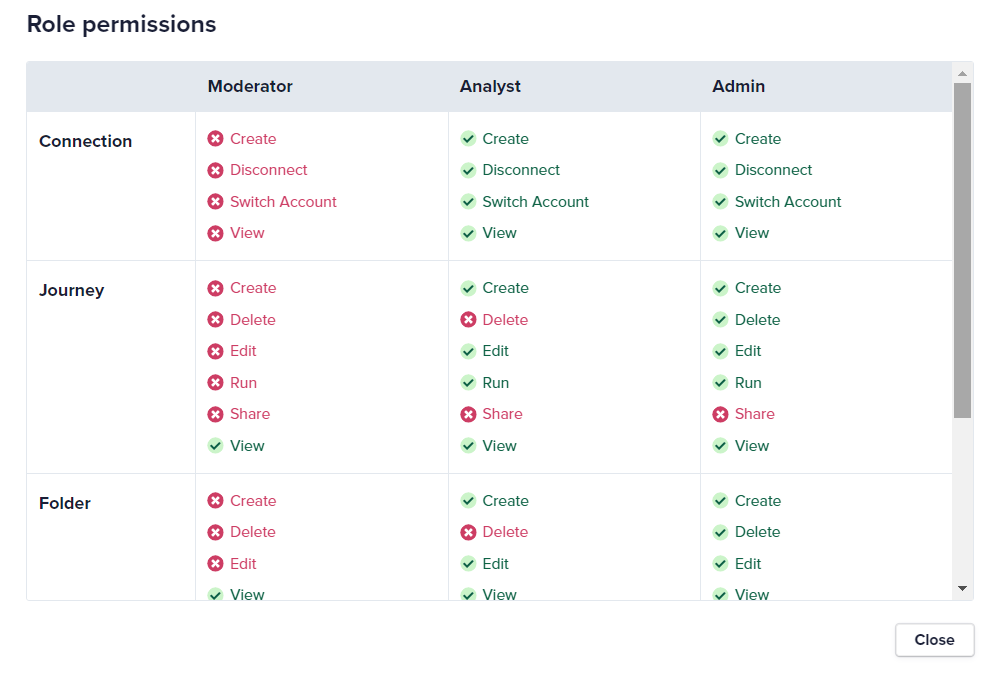
- Admin: They can perform all the functions with regard to connection, Journey, folder, version, history, except sharing a Journey.
- Analyst: They can perform all the functions with regard to connection, Journey, folder, version, history, except deleting a folder, and deleting and sharing a Journey.
- Moderator: They can only view the shared folder, Journeys in them and versions.
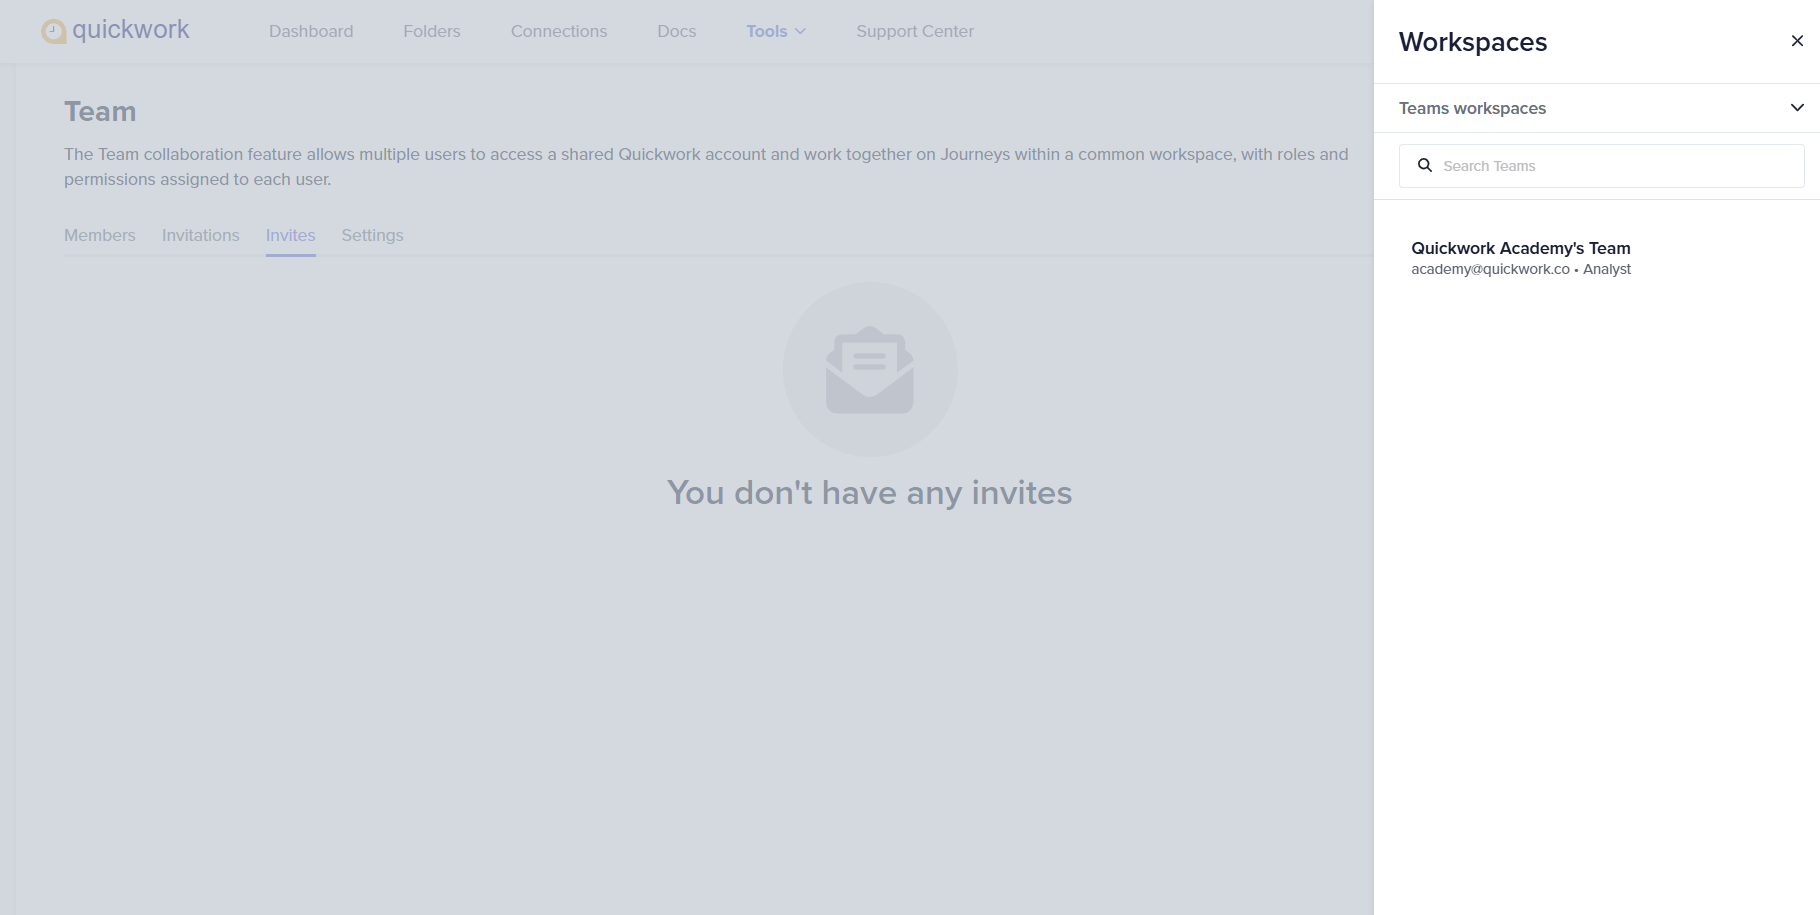
Accepting the invitation
All the invitations you send to other users appear in the Invitations tab, while the invitations you have received to join other teams appear in the Invites tab. The invitee also gets an invitation email with the details of the team name and assigned role.
To accept the invitation via email:
-
The invitee will get an invitation email. The invitation email showcases the team name and assigned role as per which the invitee is asked to contribute.
-
To accept the invitation, click the View Invitation button.

-
Login to Quickwork and click the Invites tab to see the invitations sent to you.
-
To accept the invitation, click the Accept button.
To accept an invitation from Quickwork:
- Navigate to Tools. Click Team.
- The invitations sent to you appear on the Invites tab.
- To accept the invitation, click the Accept button.
Working with the team
To work with the team, you are a part of:
-
Go to the User profile menu at the top-right corner of Quickwork home page and click the Switch Workspaces option.
-
A list of all the teams you are a part of is displayed. Click the workspace you want to access.
-
You will be redirected to the Folders page of the team owner’s account. As per your role’s permissions, you will be able to access the components.
-
To go back to your account, click on My workspace on the User profile menu.
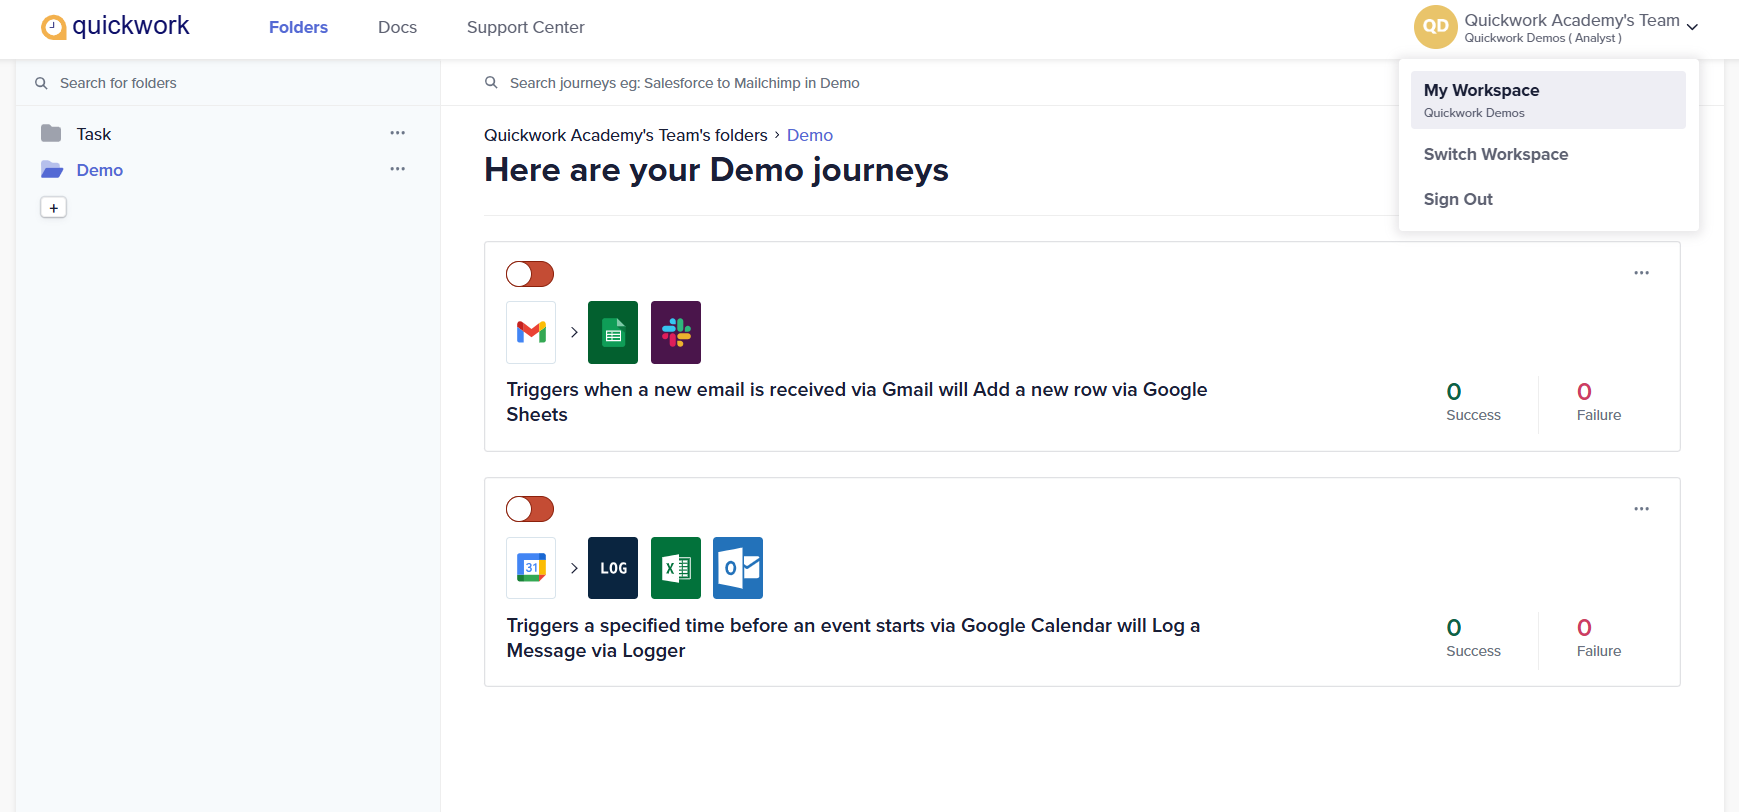
Switch Workspaces option appears in the User profile menu only if you are a part of a team or teams.
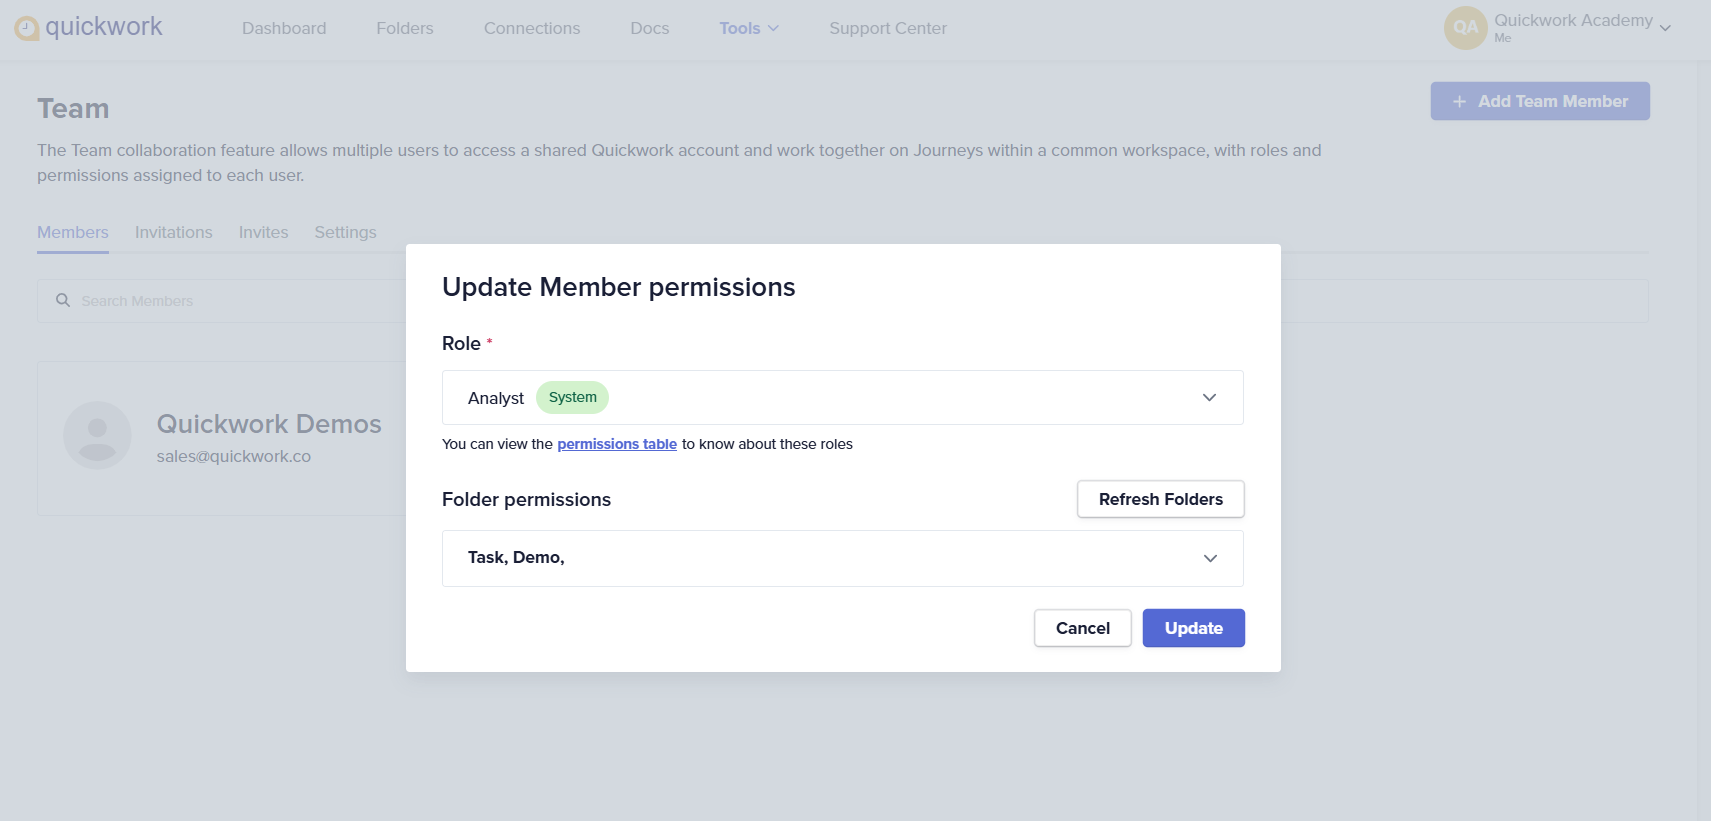
Editing the role of a team member
You can edit the roles of the members you have added to your team. You can also add or delete the folders the members have access to.
To edit the role of a team member:
-
Navigate to Tools. Click Team, and then Members tab.
-
Locate the team member you want to edit, and click the three horizontal ellipses.
-
Click the Edit button.

-
In the Update Member Permissions dialog box, make the edits as required.
-
Click the Update button. The team member’s permissions and role are modified.
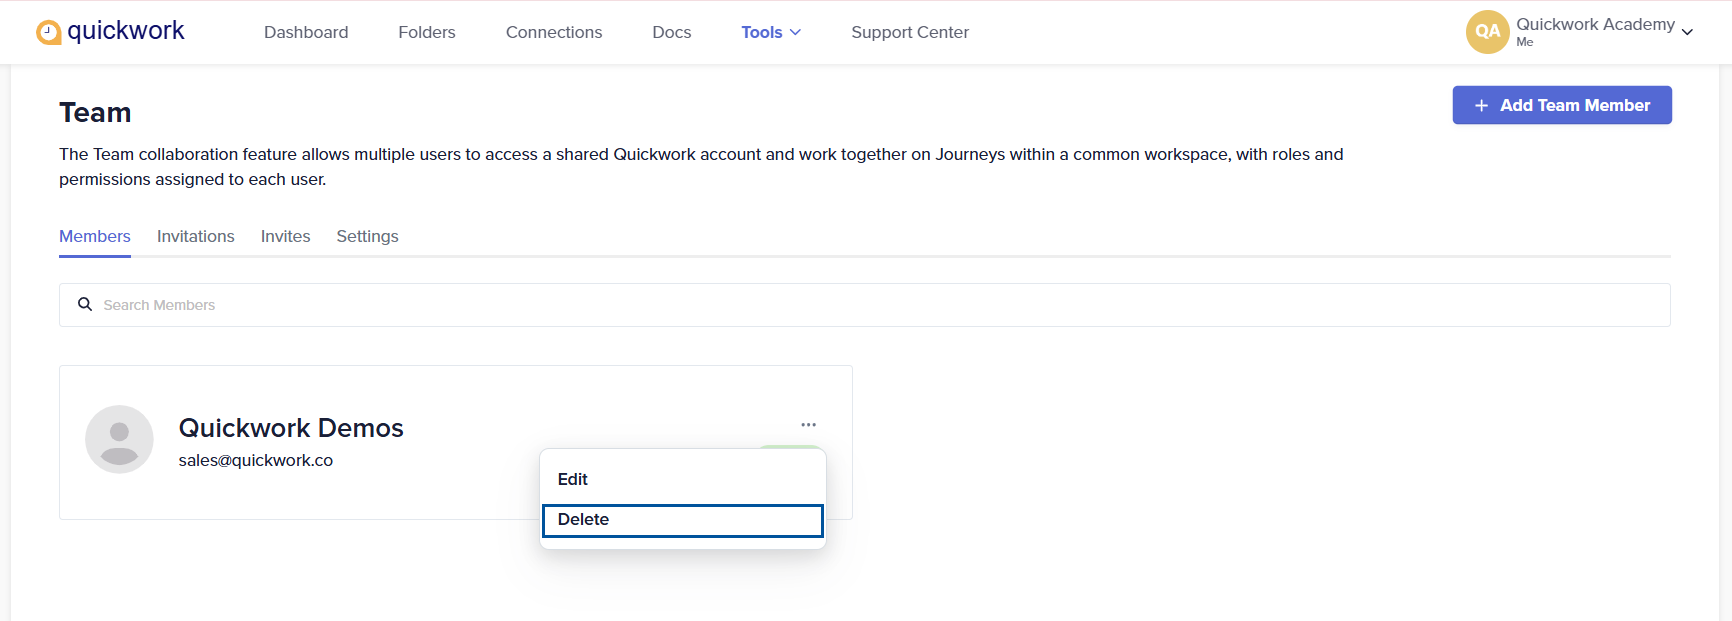
Deleting a team member
To delete a team member:
-
Navigate to Tools. Click Team, and then Members tab.
-
Locate the team member you want to delete, and click the three horizontal ellipses.
-
Click the Delete button. The member will be deleted from the team. This member will no longer have access to your account.
❓ Troubleshooting
- Invitation not received:
- Verify the email address entered for the invitation is correct.
- Check the spam or junk mail folder for the invitation email.
- Error accessing shared folders:
- Check that the correct folders are shared with the appropriate permissions.
- Ensure members are assigned the correct roles that have permissions to access these folders.
- Unable to see the Tools menu and other tabs on the platform: You are not in your own account but in your team's workspace. Here’s how you can switch:
- Click on the User profile drop-down menu located at the top right of the screen.
- A list of all the teams you are a part of will be displayed.
- To switch back to your personal account, click on My Workspace.
- Prevent team members from viewing transaction details in history: To restrict team members from viewing transaction details, assign them the Moderator role. The moderator can only view the shared folder, Journeys in them and versions.
✏️ Tips and recommendations
- Periodically review and adjust the permissions and roles of team members to ensure they align with current project needs and security policies.
- Clearly define what each role is permitted to do within Quickwork to avoid confusion and unintended access issues.
- Utilize the audit logs to monitor team activities, ensuring compliance with protocols and identifying any unauthorized or suspicious actions.
- Establish clear guidelines on how the team should use Quickwork, including standards for creating, sharing, and managing Journeys and other resources.