Custom action
Quickwork's Custom action feature empowers users to interact with any specific application's API, enabling the execution of actions not already built within the platform.
A Custom action in Quickwork allows you to define and send HTTP requests to external APIs of specific connectors, facilitating operations such as creating, reading, updating, or deleting data in connectors that may not have pre-built actions within Quickwork.
This functionality extends Quickwork’s capabilities beyond predefined actions, giving developers full flexibility to interact with app-specific endpoints and operations.
Custom actions are useful when:
- You wish to integrate with a custom or third-party API not yet listed on Quickwork.
- You want fine-grained control over the request structure, including method, headers, parameters, and body.
All required details, including endpoint URLs, HTTP methods, headers, and payload structures, can be found in the official API documentation of the respective application.
✅ Pre-requisites
- An account on Quickwork.
- API endpoint details from the third‑party service (URL, method, request/response format).
- Authentication credentials such as API key, OAuth token, or Basic Auth (depending on the service).
Configuring a Custom action: Input fields explained
To set up a Custom action, you will need to provide specific details that define the action. Here's a breakdown of each input field:
-
Action name: A user-defined name for the custom action, aiding in identification within your Journey.
For example, Create New Contact, Fetch User Data. -
Method: Specifies the HTTP method for the request, such as, GET, POST, PATCH, PUT, DELETE
GET – Retrieve data
POST – Create data
PUT / PATCH – Update existing records
DELETE – Remove data -
API endpoint: Defines the specific endpoint path relative to the base URL of the API you are interacting with.
You can dynamically reference data pills here.For example,
/api/v1/contacts, /v1/customers/{{customer_id}}/invoices -
Request type: Indicates the content type of the request body.
Options: application/json, application/x-www-form-urlencoded, text/plain, multipart/form-data, application/xml For example, application/json when sending JSON data. -
Request headers: Includes custom headers as key–value pairs (optional).
For example,Header Name Header Value Accept application/json Connection keep-alive -
Request body: Contains the data (payload) to be sent in the request body for for POST, PUT, or PATCH requests.
{
  "email": "[email protected]",
  "status": "active"
}
-
Request query parameter: Adds key-value pairs to the URL as query parameters.
For example,Param Name Param Value limit 10 sort desc
-
Response body schema: Defines the expected structure of the response body, assisting in parsing the response. This schema generates data pills that can be used in subsequent steps. For example,
{
    "id": "123",
    "name": "John Doe",
    "email": "[email protected]"
  }
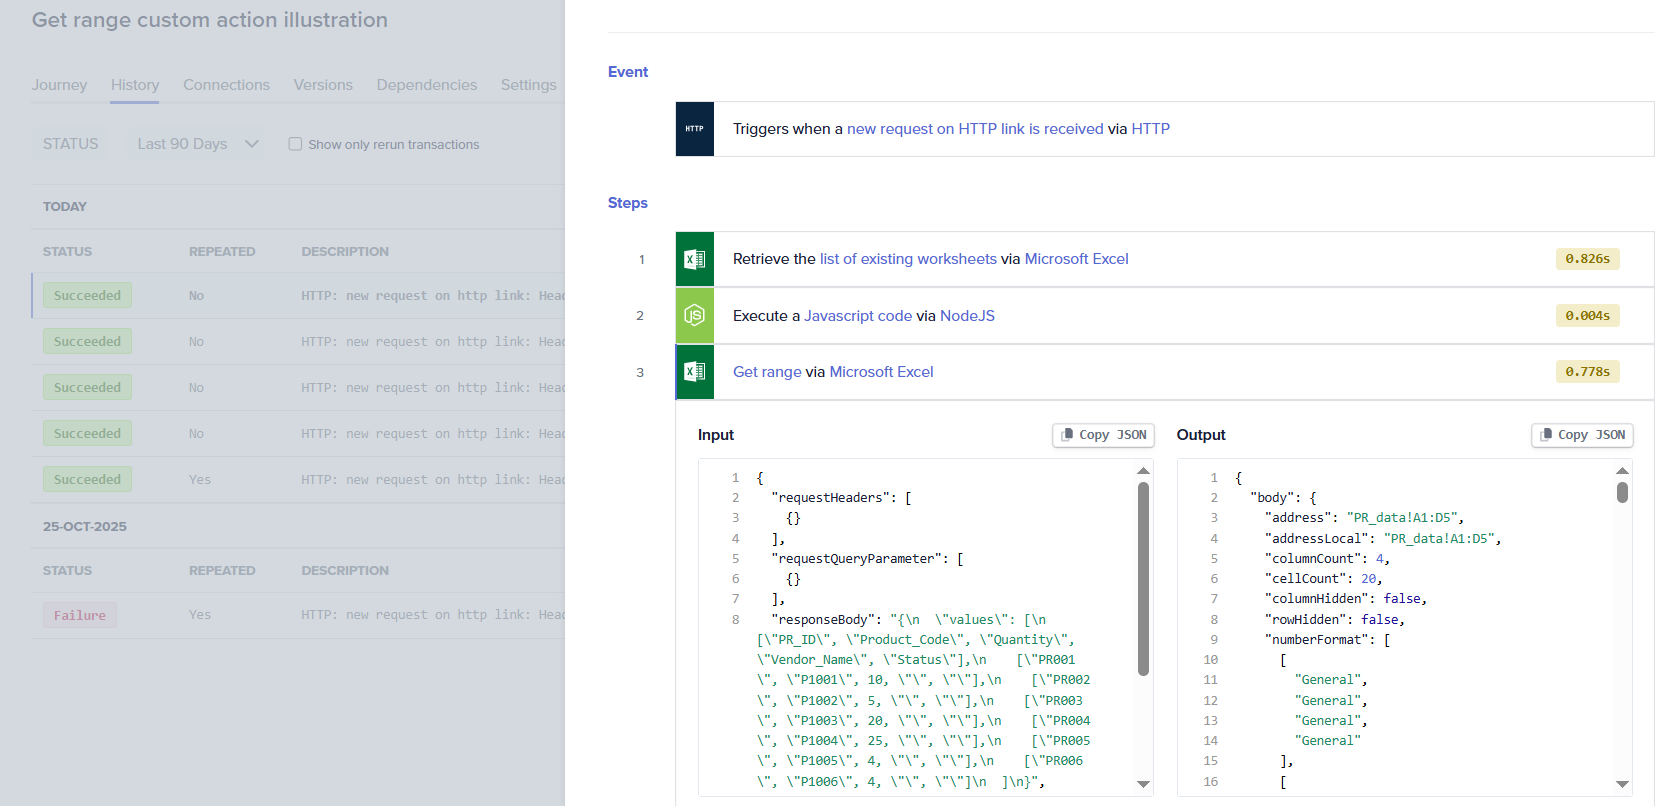
Use case: Dynamically fetch data from Microsof Excel
This Journey automates the process of retrieving data from a Microsoft Excel sheet stored in OneDrive or SharePoint. Instead of manually entering the workbook ID, it extracts it programmatically using a NodeJS step and then uses it to fetch all populated rows and columns from the target worksheet through a custom API action.
The link to the Microsoft Graph Excel API documentation: https://learn.microsoft.com/en-us/graph/api/resources/excel?view=graph-rest-1.0
-
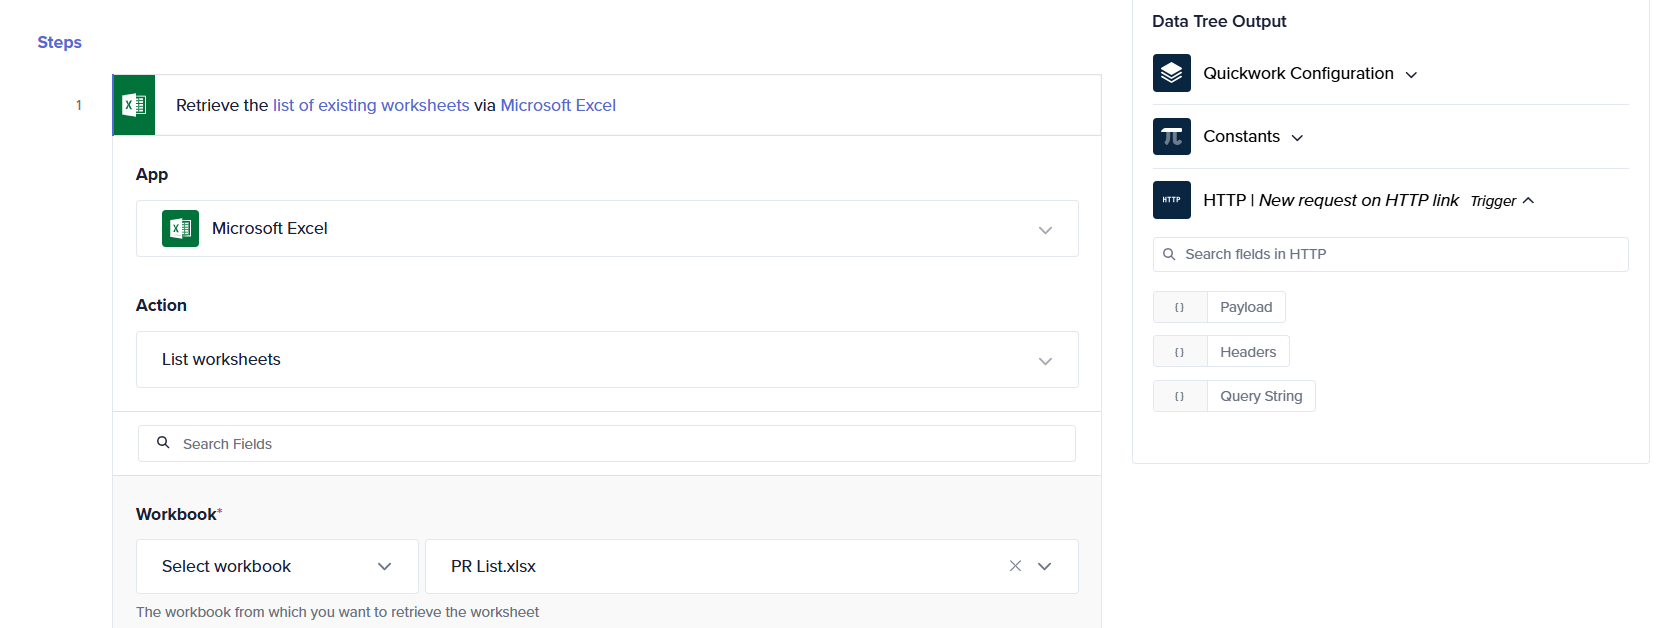
Microsoft Excel – List worksheets action retrieves all the worksheets from a selected workbook (for example, PR List).
-
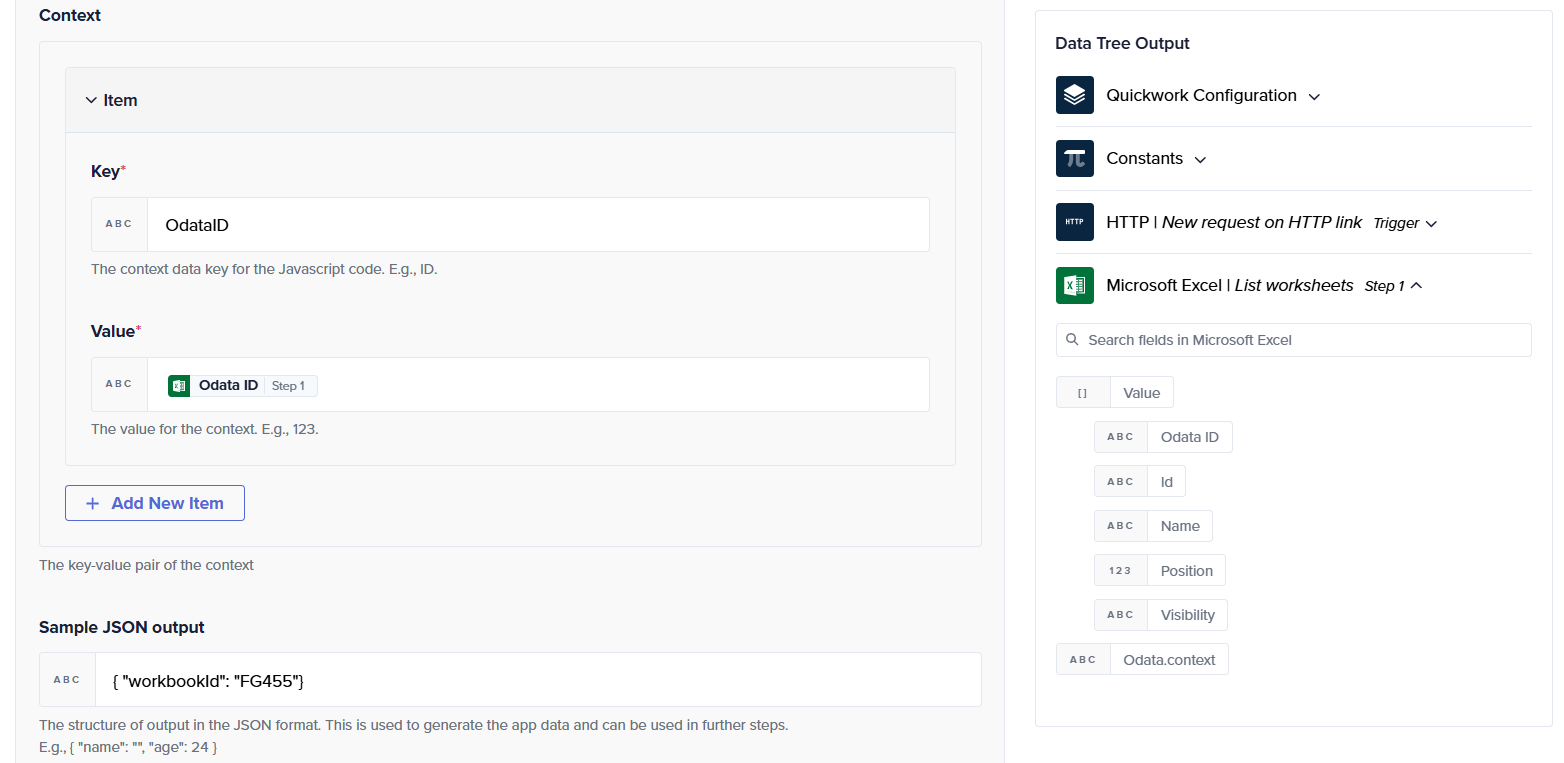
The NodeJS – Run JavaScript action processes the Odata ID value from the previous step to extract only the workbook ID. A simple regex-based script isolates this portion and returns it as output.
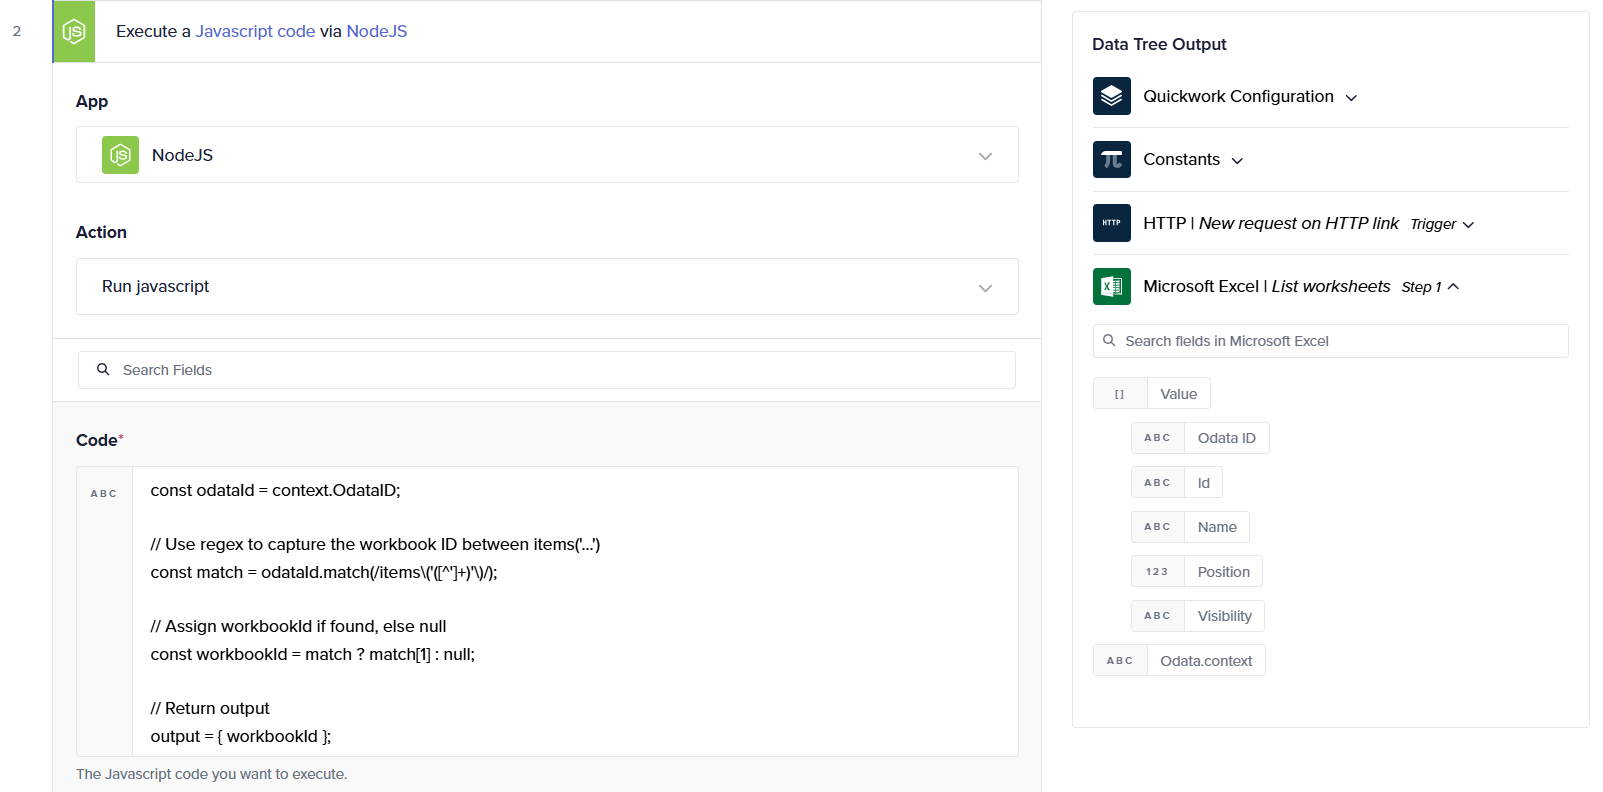
The Sample JSON output makes it available as a data pill for the next step.
- In the Microsoft Excel – Create custom action with Action name as Get range, uses the extracted Workbook Id and worksheet Id obtained from Step 1 to call the endpoint. This retrieves all populated cells dynamically from the worksheet without needing to specify a manual range.
/me/drive/items/{workbookId}/workbook/worksheets/{Id}/usedRange 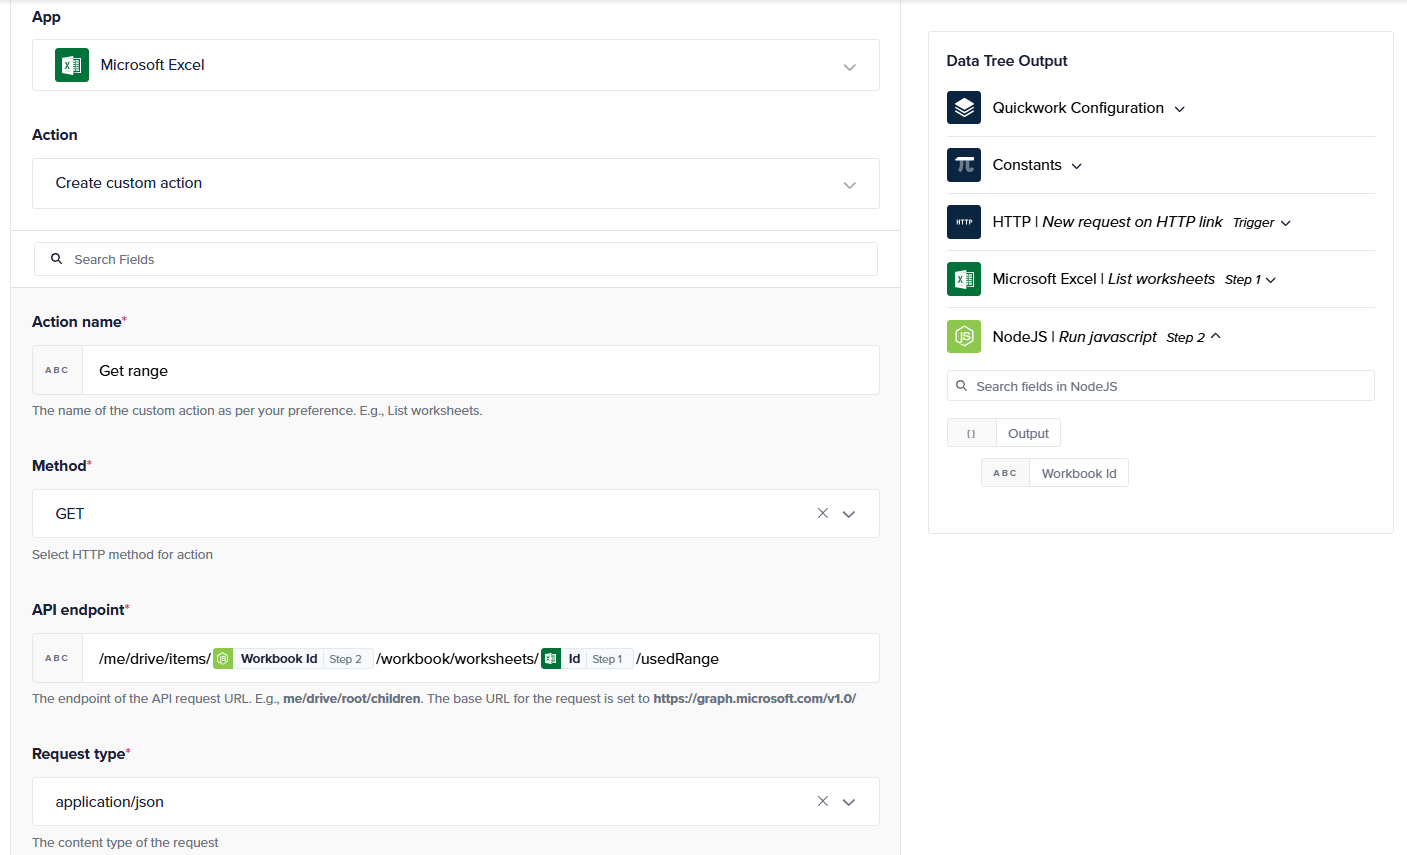
-
Click Save & Start to run the Journey and begin execution.
-
Once the Journey is triggered, open the History tab that includes the fetched Excel data from the specified worksheet.