Transaction tables
This section explains transaction tables in Quickwork and how to customize it for improved visibility.
Custom history tables, or Edit Table, are a Journey-level feature that allows you to selectively extract and display data from the Journey. Customizing table enhances visibility and accessibility, allowing you to view essential information without opening individual transaction reports. It also enable you to filter and search through transactions based on column values.
You can choose to mask or unmask specific elements, ensuring that only necessary information is available for debugging purposes. This approach prevents the exposure of all input and output data across the steps in your Journey.
✅ Prerequisites
- Access to Quickwork.
- Basic understanding of Quickwork terminologies and familiarity with Quickwork's GUI.
- Access to the active Journey that you wish to monitor.
Customizing the transaction table
-
Go to the Journey whose transaction table you want to customize. If it is currently in execution, click the Stop Journey button to pause it temporarily.
-
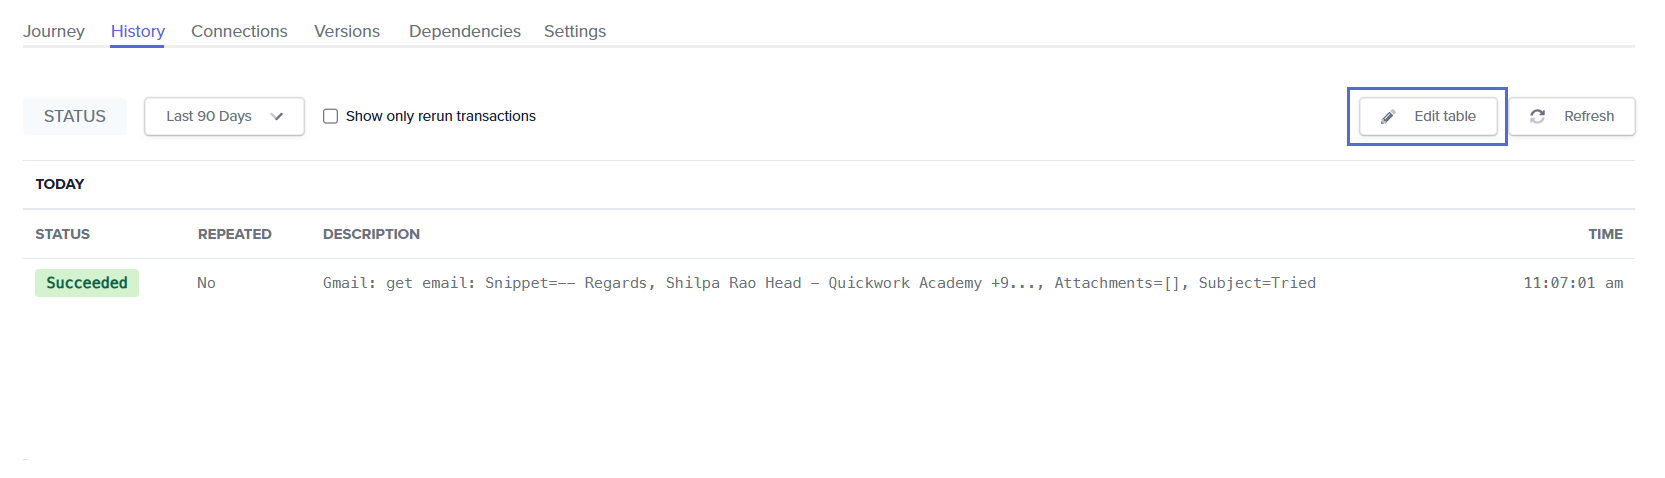
Go to the History tab of the Journey. Click on the Edit table button to open the customization settings. The Customize Transaction Table pop-up appears.
-
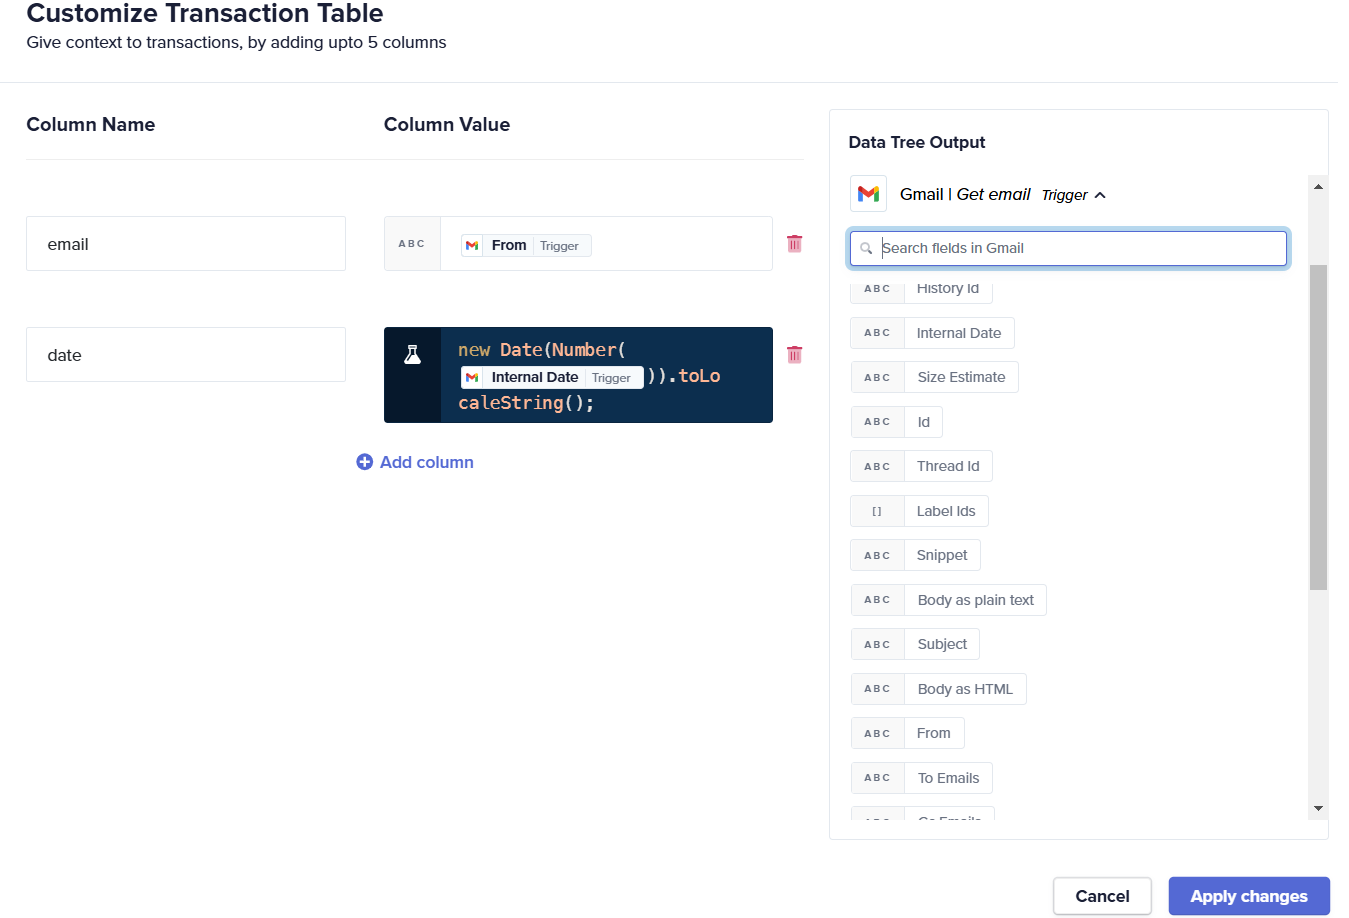
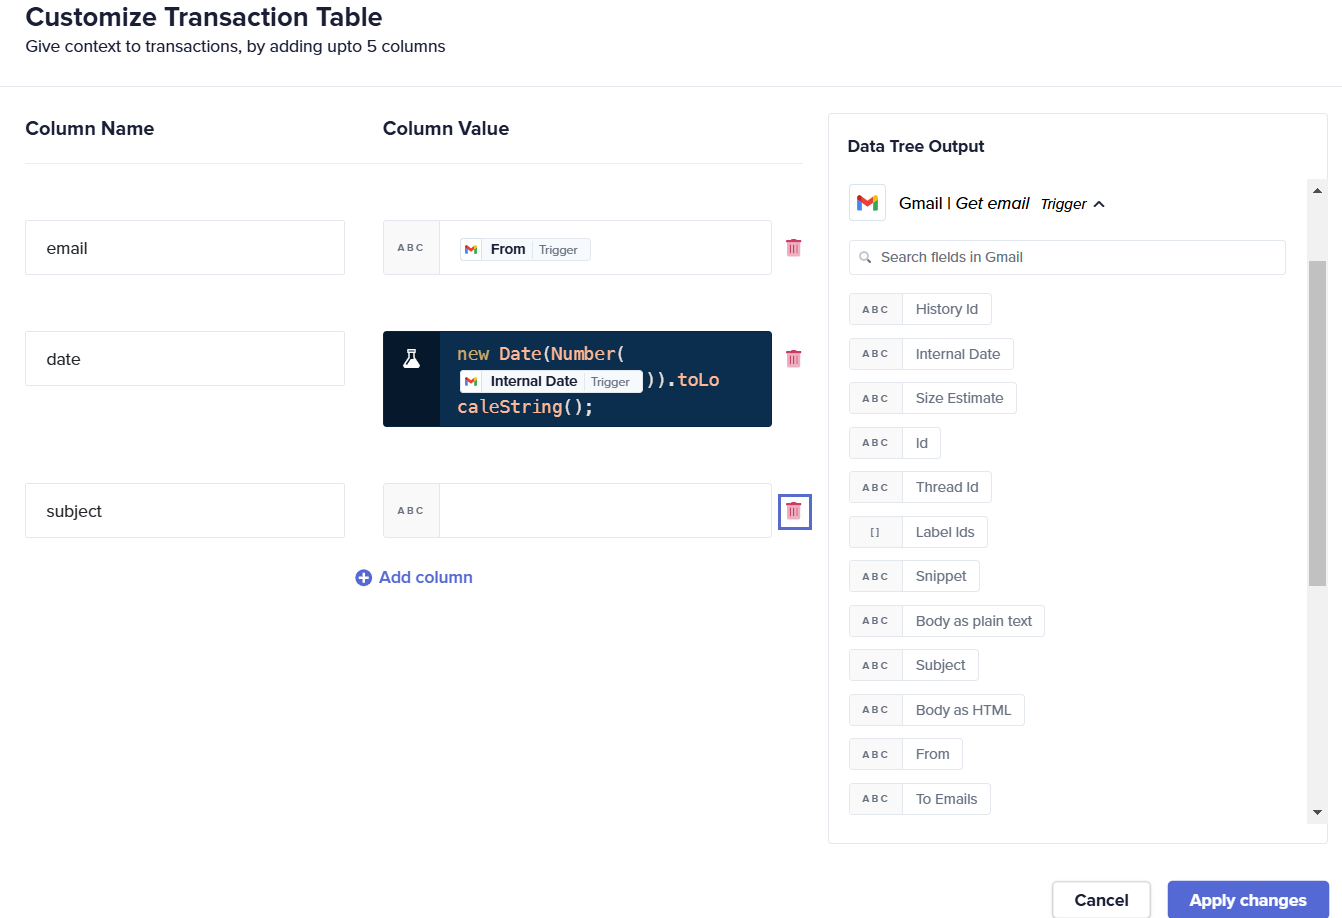
Add and configure the columns:
-
Column Name: Enter a descriptive name for the column of data you want to display.
-
Select Column Value. You can choose any format from text containing digits, characters, special characters, data pills from the Data Tree Output, or formulas associated with text or data pills.
-
Drag and drop a data pill, such as From, Internal Date from the Data Tree Output, to link dynamic content from your Journey to Column Name email and date. The date Column Value is toggled to Formula mode to convert to local time settings.
-
If you need additional columns, click on Add column to enter further column names and values as required.
-
-
After setting up the columns as needed (up to a maximum of five), click Apply changes to update the transaction table.
Column values longer than 200 characters are shortened in History and displayed with an ellipsis (...). This helps keep the History tab readable.
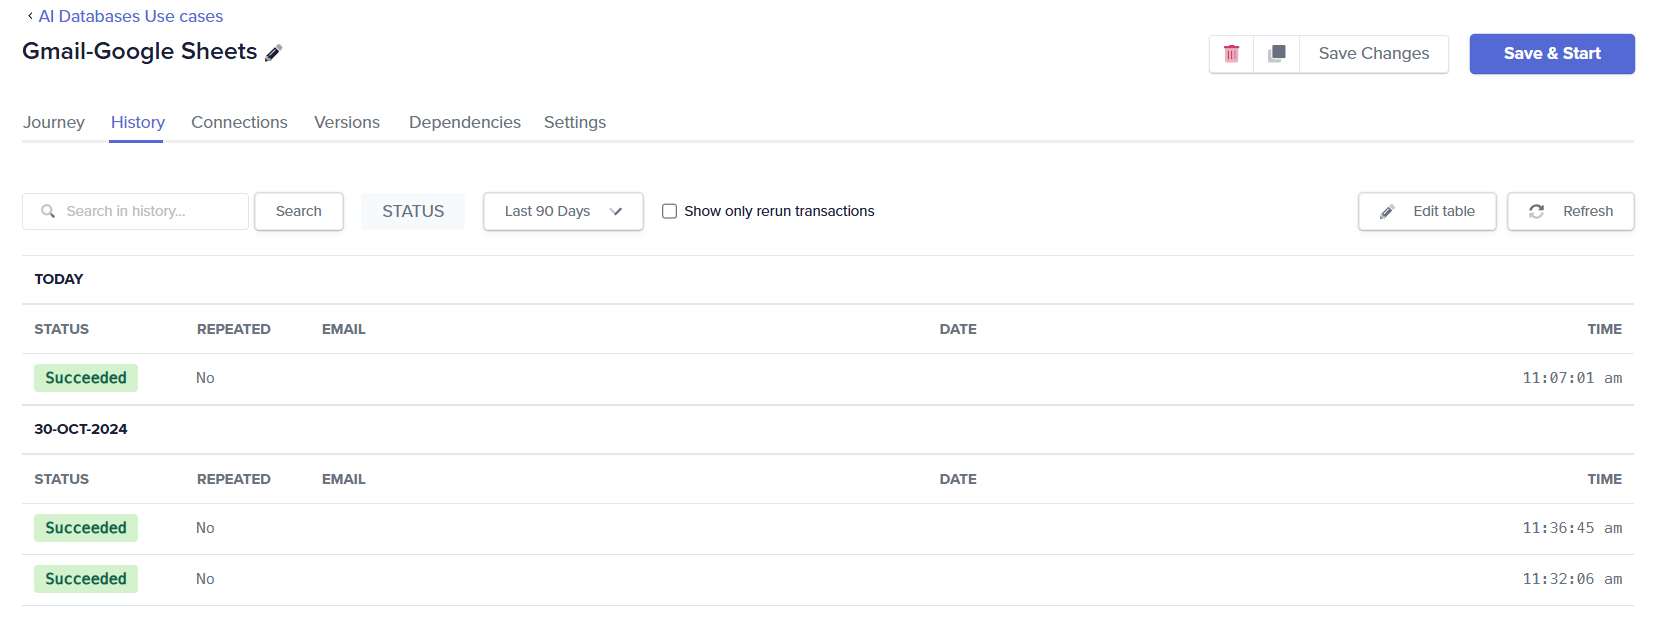
- To resume the Journey, click on Save & Start. Once the trigger is initiated, refresh the History tab to see the new data displayed in the transaction table.
Any updates to the transaction columns will only apply to transactions created after the update, not those executed before the update.
Managing the customized transaction table
-
Editing columns: You can return to the edit mode by clicking on the Edit table to change the name or value of existing columns to better suit your evolving needs and click on Apply changes.
-
Deleting columns: To remove a column, stop the Journey, open the customization settings, and use the delete icon next to the column you wish to remove.
Uses of customizing the transaction table
Customizing the transaction table allows:
- Immediate visibility of critical data points.
- Streamlining the process of monitoring and analyzing Journey output.
- Identifying trends or issues without extensive navigation through individual transaction reports.
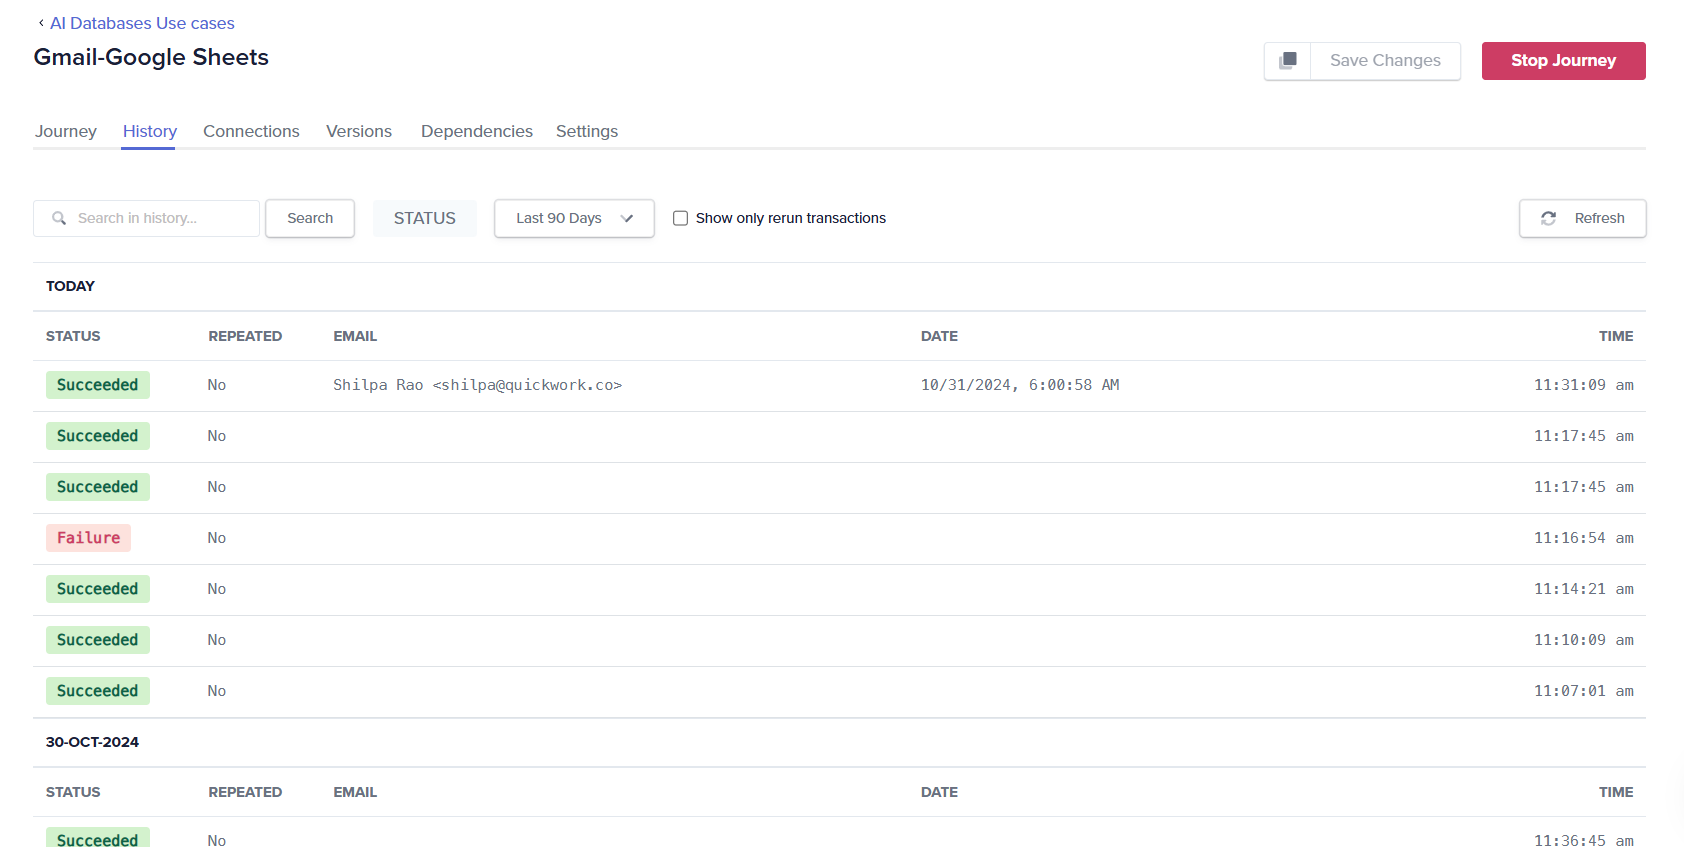
- Filtering transactions by search in history for values within the columns, aiding in the investigation and debugging of any transaction that behaved differently than expected. With transaction table, you do not have to manually review each transaction's data by opening each transaction.
❓ Troubleshooting
- Journey execution issues: If changes to the transaction table do not appear to take effect, ensure the Journey has been restarted after modifying the table. Changes only apply to executions that occur after the customization.
- Data mismatch:
- Verify that the correct data pills are being used. Incorrect or irrelevant data pills can lead to inaccurate information being displayed.
- Check for any typos in column values, which can lead to incorrect data displays.
- Visibility of columns: If the newly added columns do not appear, refresh the History tab after applying changes and ensure that the Journey has been executed at least once after modification.
✏️ Tips and recommendations
- Use clear and descriptive names for each column to ensure that anyone reviewing the History tab can easily understand the presented information without needing to refer to the documentation.
- Choose data pills that provide the most value for monitoring, searching, and analysis. Consider the most critical data points that will help in quick decision-making or troubleshooting.