Scheduler by Quickwork
This section explains Scheduler by Quickwork which is a powerful tool for automating tasks by triggering Journeys at specified dates and times.
Scheduler by Quickwork is especially useful for managing repetitive tasks that need to occur on a regular schedule.
Key features of Scheduler by Quickwork
- Configurable scheduling options: The scheduler enables setting up triggers for Journeys at specific times, suitable for recurring tasks (daily, weekly, monthly) or one-time events planned for a future date. This flexibility supports various business needs, from regular report dispatches to routine data backups.
- No authorization required: Since the scheduler is an internal tool created by Quickwork, it does not require any additional authorization to set up and use, which simplifies the process of implementing it in any Journey.
- Integration capability: The scheduler can be combined with other apps and services within Quickwork to perform complex Journeys. For example, it can trigger a Journey that retrieves data from a database, processes it, and then sends a report via email, all at a scheduled time.
- Delay actions: Apart from triggering actions at specific times, it can also introduce delays within Journeys. For instance, after an action is performed, the Journey can be paused for a set duration before the next step is executed. This is useful in scenarios where a buffer period is needed between tasks.
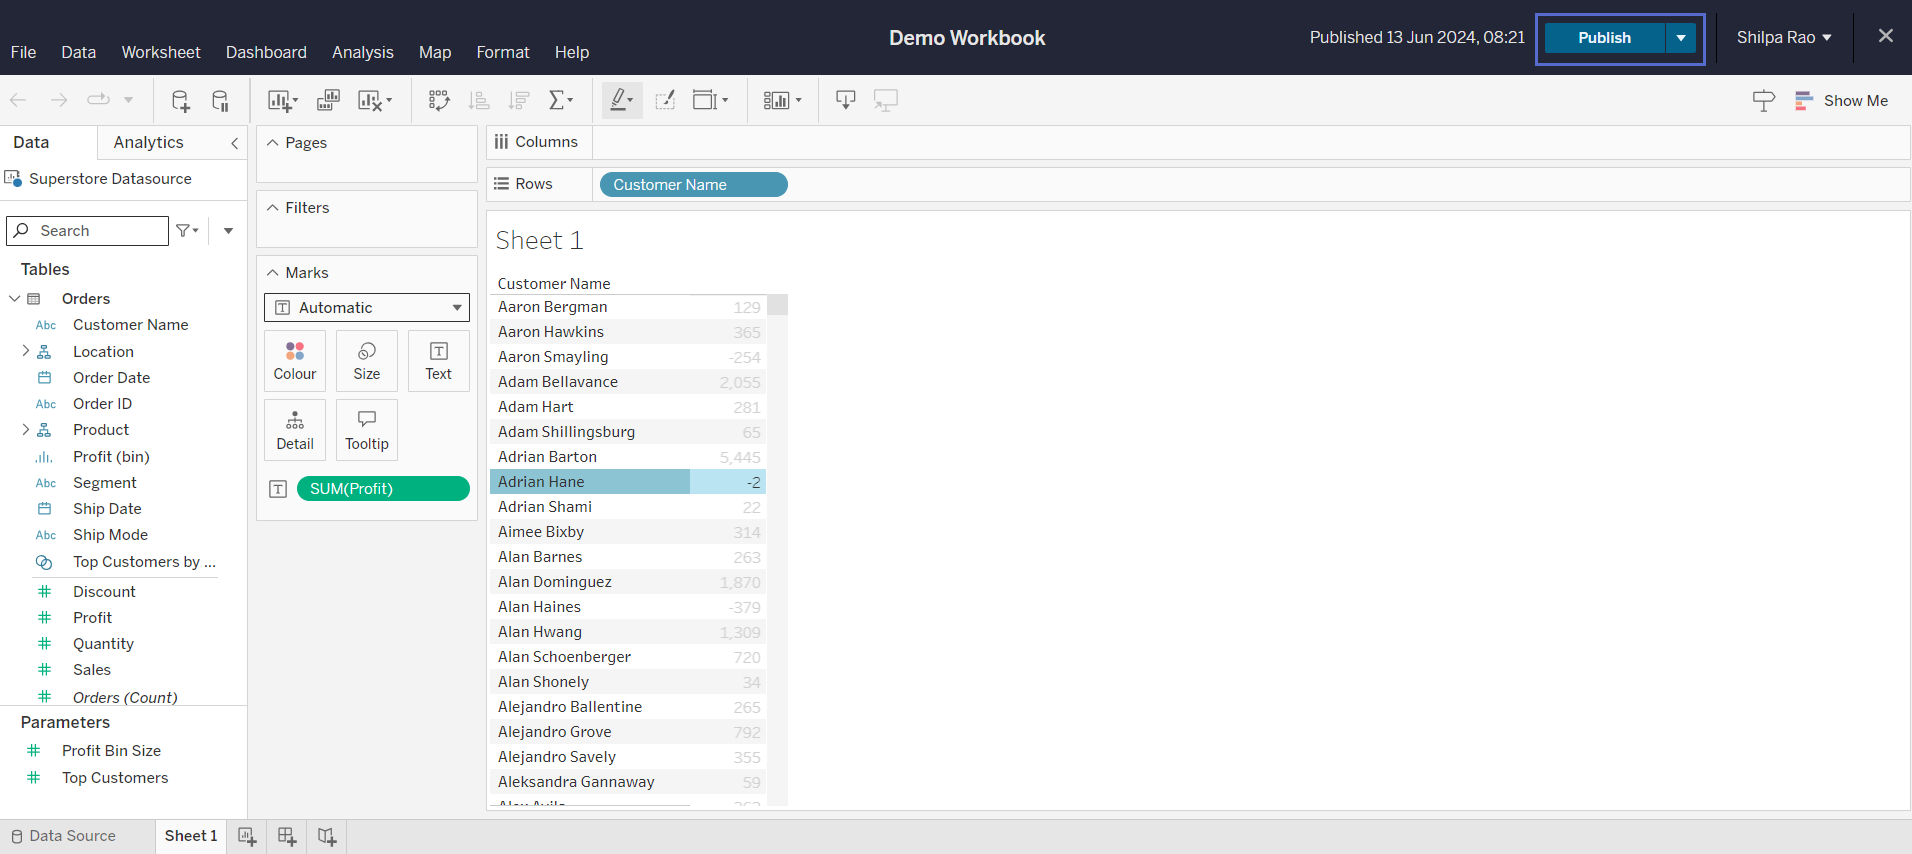
Consider a scenario which involves automating the daily delivery of a Tableau report via email using Quickwork's Scheduler, Tableau, and Gmail Secondary integrations. It ensures that a specified report from Tableau is generated and sent to an email address every day at a designated time.
✅ Pre-requisites
- A publicly accessible sheet in a workbook created using Tableau.
- Active connections to Tableau and Gmail Secondary on the Quickwork platform.
Building the Journey using Scheduler by Quickwork
-
Configure the trigger:
- Navigate to the Journey configuration manager in Quickwork.
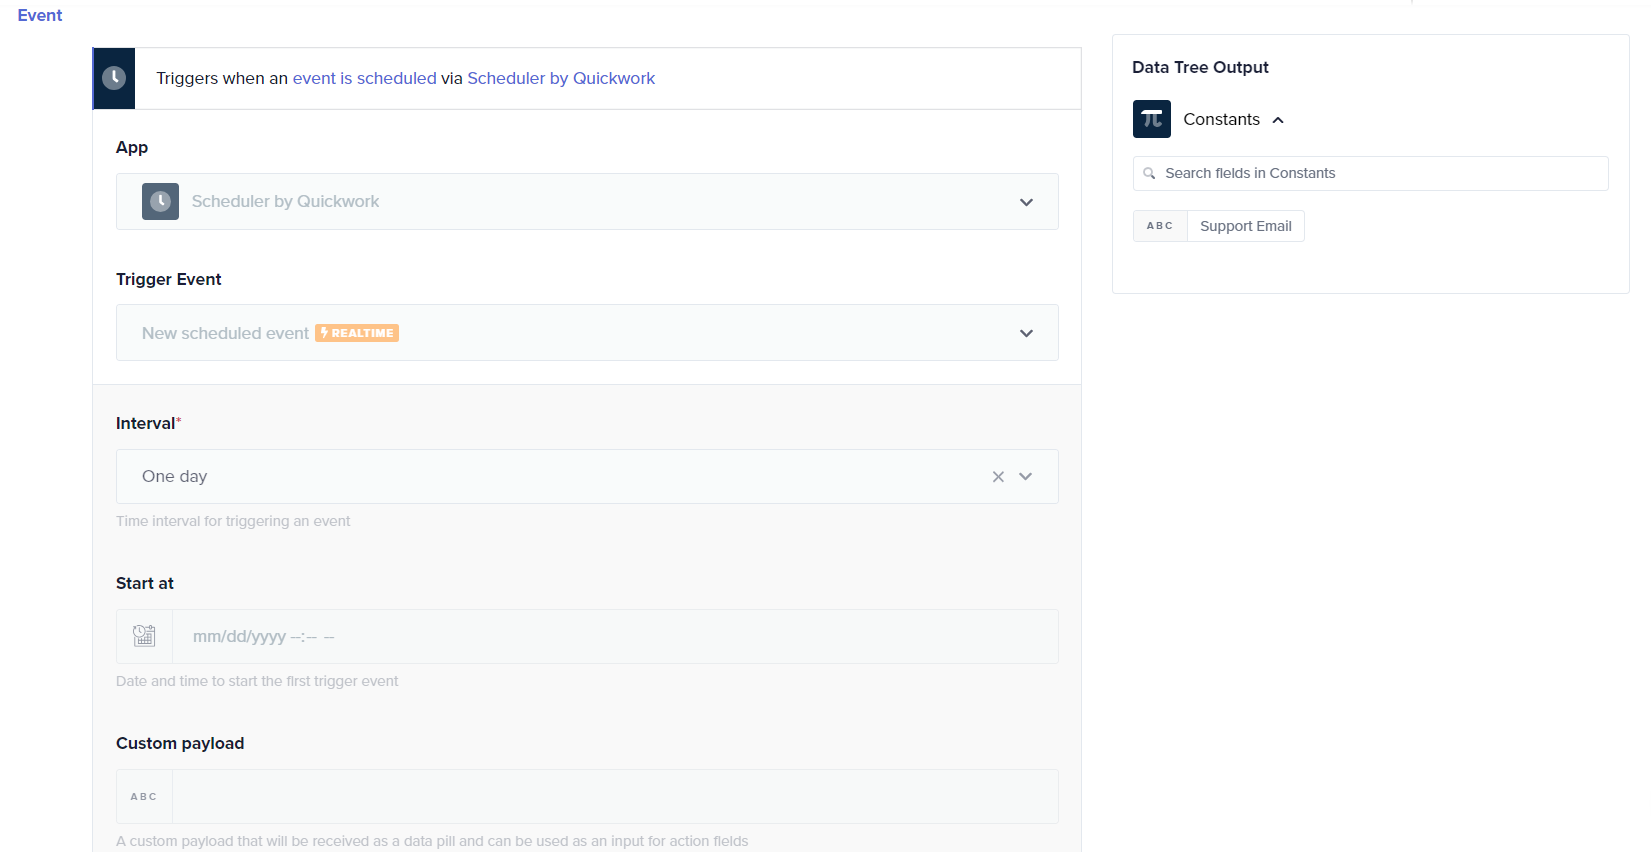
- Click on New Trigger and select the Scheduler by Quickwork app. Choose New scheduled event as the trigger event. This app does not require authorization since it is created by Quickwork.
- Set the Interval to one day.
- In the Start at field, specify the date and time from when the Journey should execute. If this field is left blank, the Journey will start immediately once it is in the execution state.
- You may leave the Custom payload field empty.
-
Configure the Tableau action:
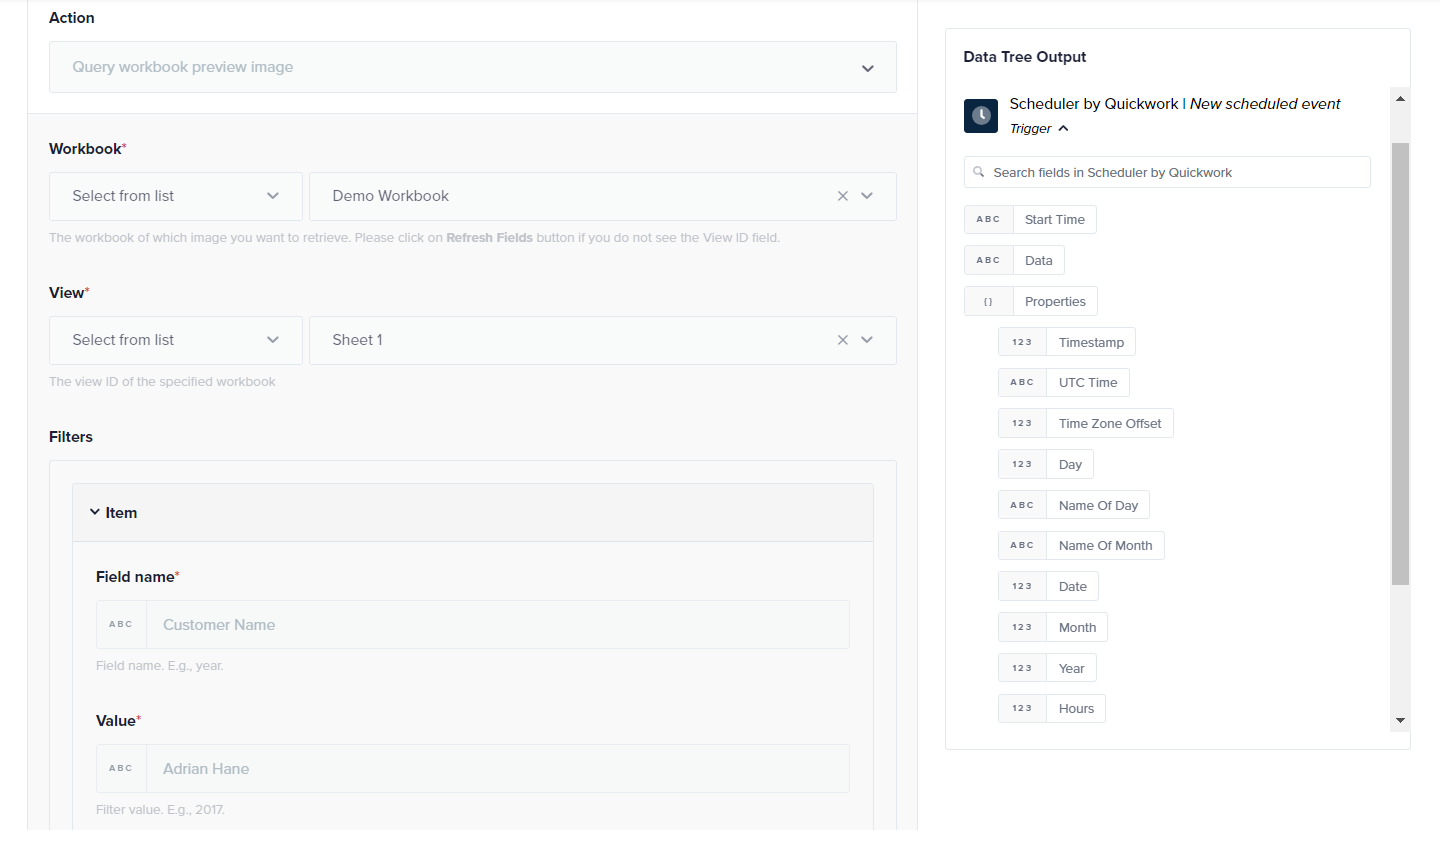
- Choose Tableau app - Query workbook preview image action.
- Select an existing connection or establish a new connection to Tableau.
- Specify the workbook and view from which the report will be generated.
- Enter the Filters.
-
Configure Gmail Secondary action:
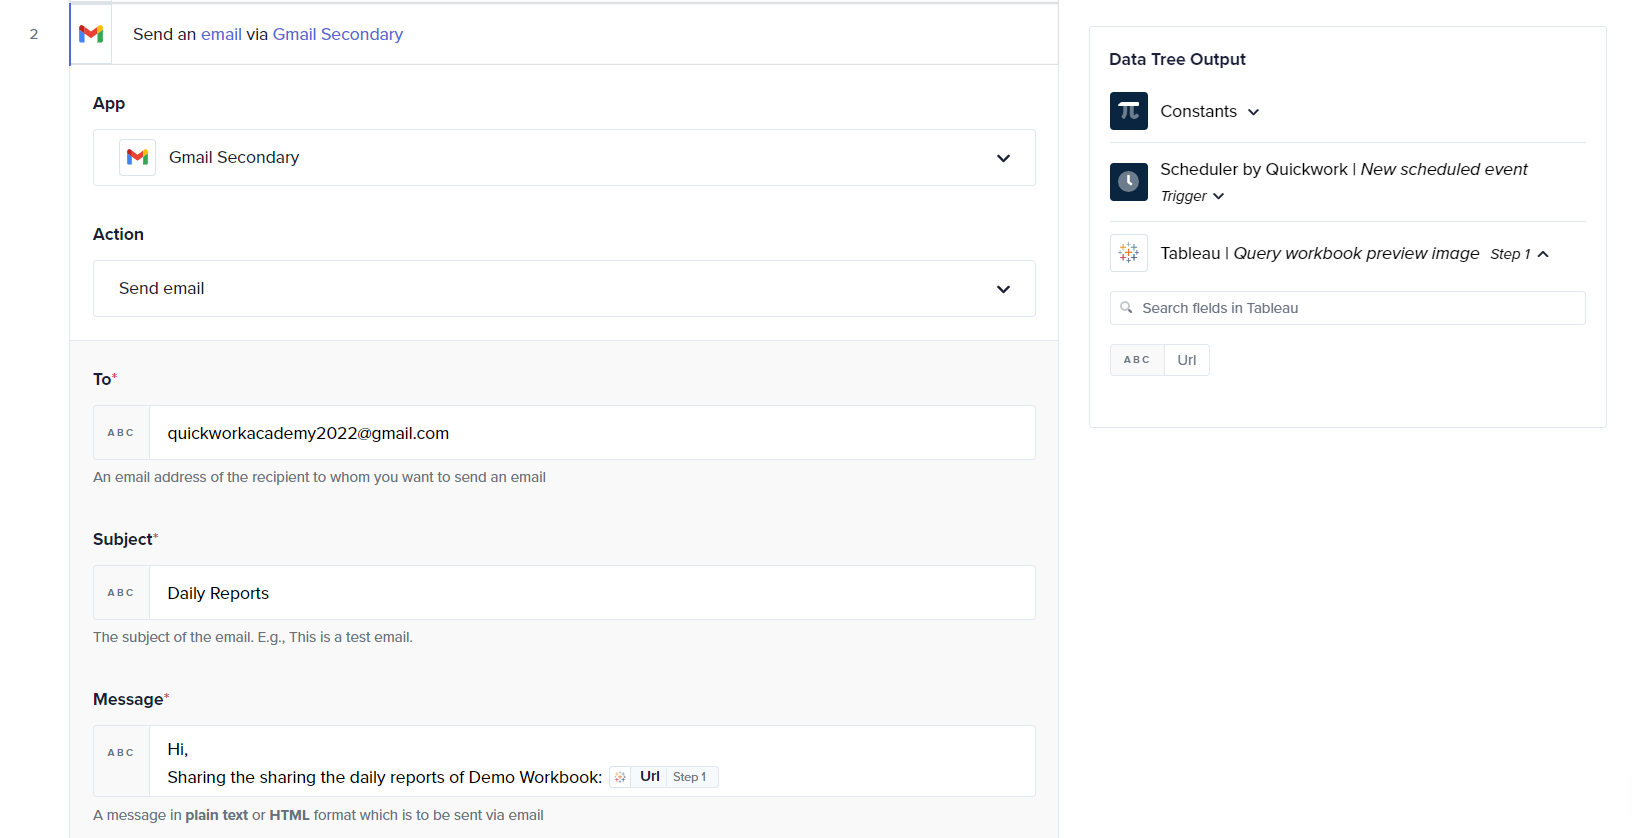
- Select Gmail Secondary - Send Email action.
- Establish a connection to Gmail if not already configured.
- To set up the email parameters, fill in the To, Subject, and Message input fields and drag the URL data pill from the Data Tree Output into the appropriate field.
-
Start the Journey:
- Click Save & Start to begin the Journey execution.
- Once initiated, the Tableau report will be sent to the specified email ID daily at the set time.
Configuring delay in a Journey using Scheduler by Quickwork
Scheduler by Quickwork, when configured as an action within a Journey, introduces delays between steps (tasks). This capability is particularly useful in scenarios requiring time-sensitive data handling or a controlled sequence of operations.
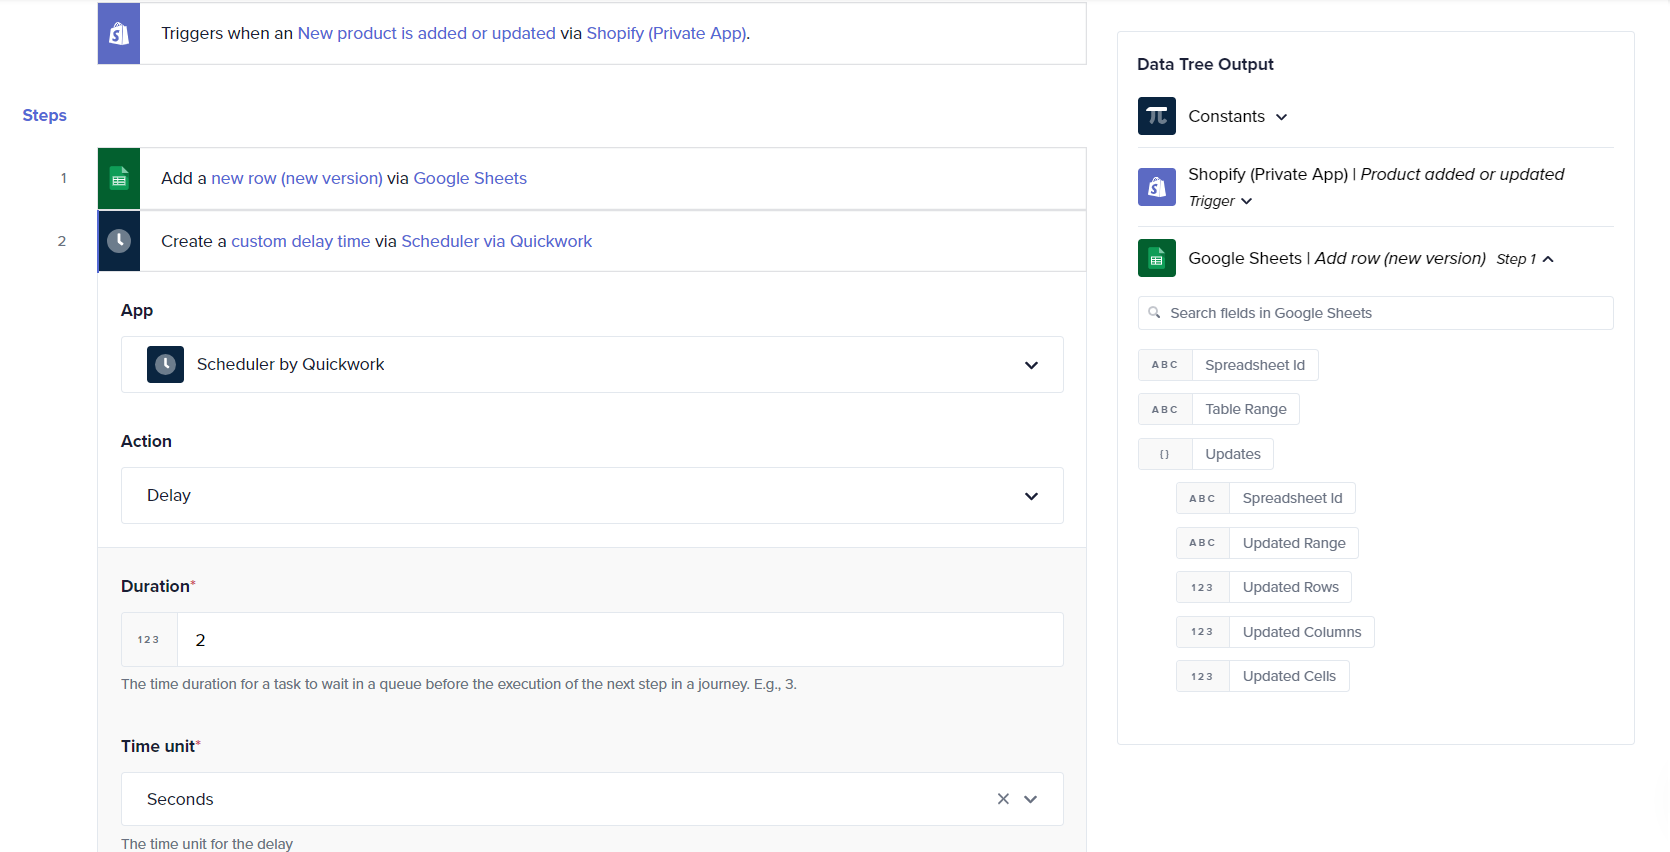
Consider a scenario wherein, whenever a new product is added or updated on Shopify, it's required to update inventory records in Google Sheets and notify the vendor. However, to ensure that the database updates and notifications are processed sequentially, a minimal delay is introduced.
- Configure the trigger to initiate when a product is added or updated on Shopify.
- Automatically sync the updated product details to Google Sheets for inventory tracking.
- Adding a delay:
- Incorporate a Delay using the Scheduler by Quickwork.
- Specify the Duration of the delay. Select the Time unit. This represents the amount of time you wish the task to wait. This delay helps manage the load on network resources and ensures that the vendor receives the notification after the database has been updated, thus maintaining data consistency.
- After the delay, use WhatsApp to send the updated product details to the vendor, ensuring they receive the most current information.
- Click Save & Start to begin the Journey execution.
❓ Troubleshooting
- Journey not triggering as expected:
- Verify that the interval and start time are set correctly.
- Ensure that the time zone in Quickwork is set correctly to match your local or intended time zone for the Journey.
- Confirm that the Journey is active. A Journey must be in the execution state to trigger according to the schedule.
- Immediate transaction history on scheduled Journeys: Clicking Save & Start initiates the Journey, which includes registering the scheduled times for execution. The Journey then activates at the designated times as configured.
✏️ Tips and recommendations
- If the Scheduler by Quickwork's Start at date is in the past or not specified, the Journey will trigger immediately. Ensure to schedule only for future dates and times.