Constants
This section explains constants, which are user-defined values designed to simplify the management of common input values across various Journeys.
Constants feature proves especially beneficial in environments where Journeys share common input requirements. Constants can be changed without the need to stop the Journey where they are used.
Sample use cases of constants
- Consider a scenario where multiple Journeys in an organization need to send automated email notifications. Instead of configuring the support email address repeatedly for each Journey, you can create a constant named Support Email with the value [email protected]. This constant can then be used across all relevant Journeys, ensuring that the email address does not need to be entered manually each time, thereby reducing the risk of errors and maintaining consistency in communications.
- Imagine a scenario where an e-commerce platform operates globally with different tax and shipping costs per region. Using Quickwork's Constants feature, the company can set up region-specific constants for taxes and shipping, such as North America Tax, Europe Shipping, etc. These constants are then utilized in pricing calculations within Journeys, automatically adjusting product prices based on the customer’s region. This system ensures accurate, region-specific pricing and simplifies updates to tax rates or shipping fees by centralizing changes to constants.
- Constants are beneficial for securely storing secret credentials or tokens required for API integrations within Journeys.
✅ Pre-requisites
- Basic understanding of Quickwork terminologies and familiarity with the Quickwork's GUI.
- Experience in creating, executing, and managing a Journey effectively from start to end.
Creating a constant
- Log into your Quickwork account.
- Navigate to Tools and select Constants. This page allows you to manage all user-defined constants.
- Click on + Create a new constant or Get started by creating a new constant, if none exists.
- Enter the values in Constant name and Constant value fields. For example, enter Support Email as the constant name and specify the corresponding email address, [email protected] as its value.
- Press Enter key or click the checkmark to confirm the creation of the constant.
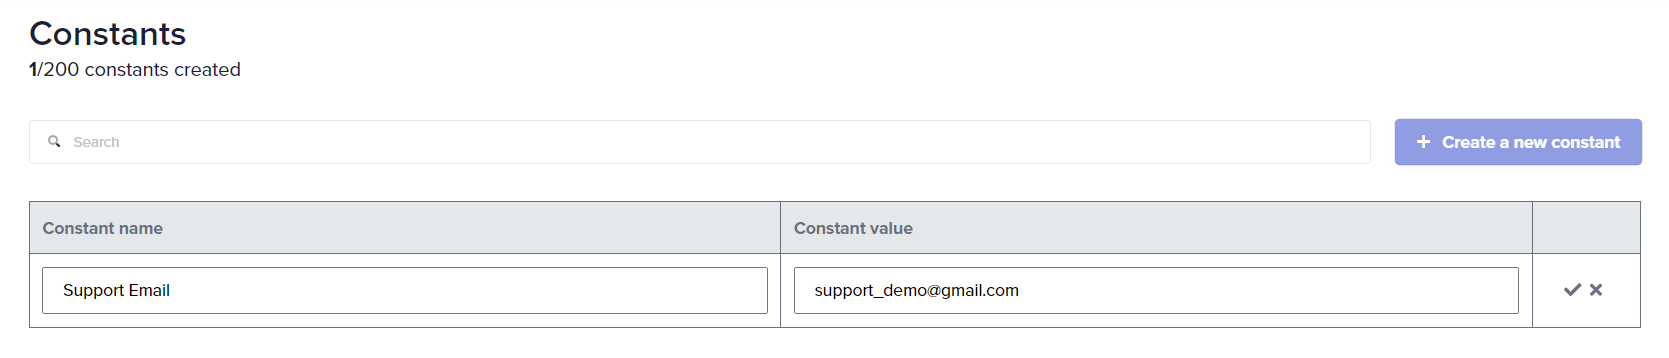
- You can create a maximum of 200 constants per account.
- Each constant must have a unique name.
Using constants in Journeys
-
Once created, constants appear as data pills in the Data Tree Output under Constants.
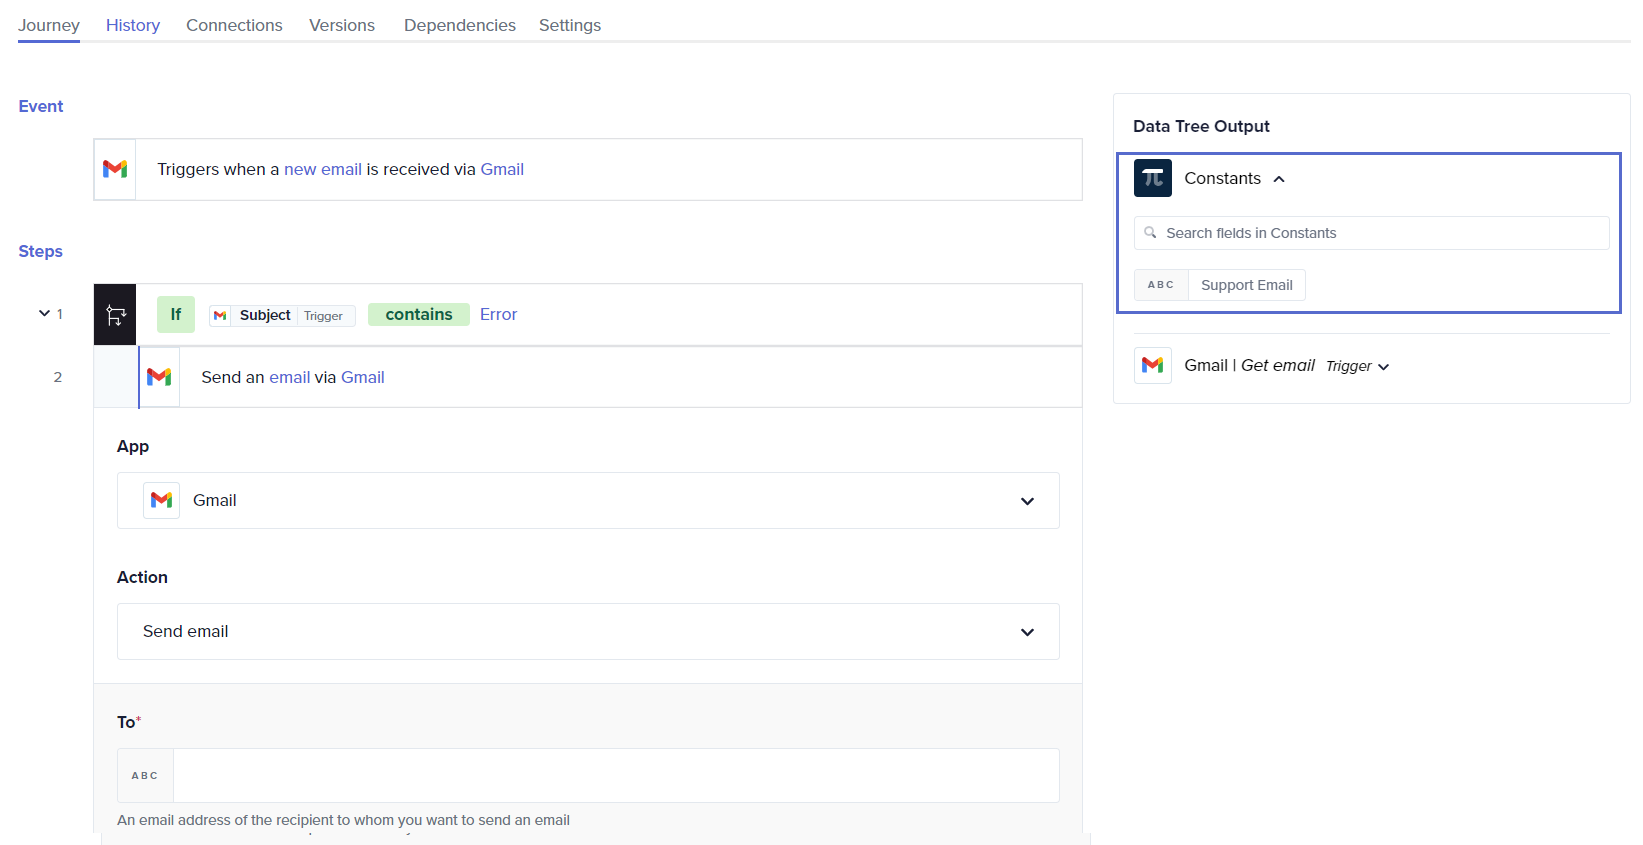
-
To use a constant in a Journey, drag the appropriate data pill into any input field where the constant’s value is required, such as the To field.
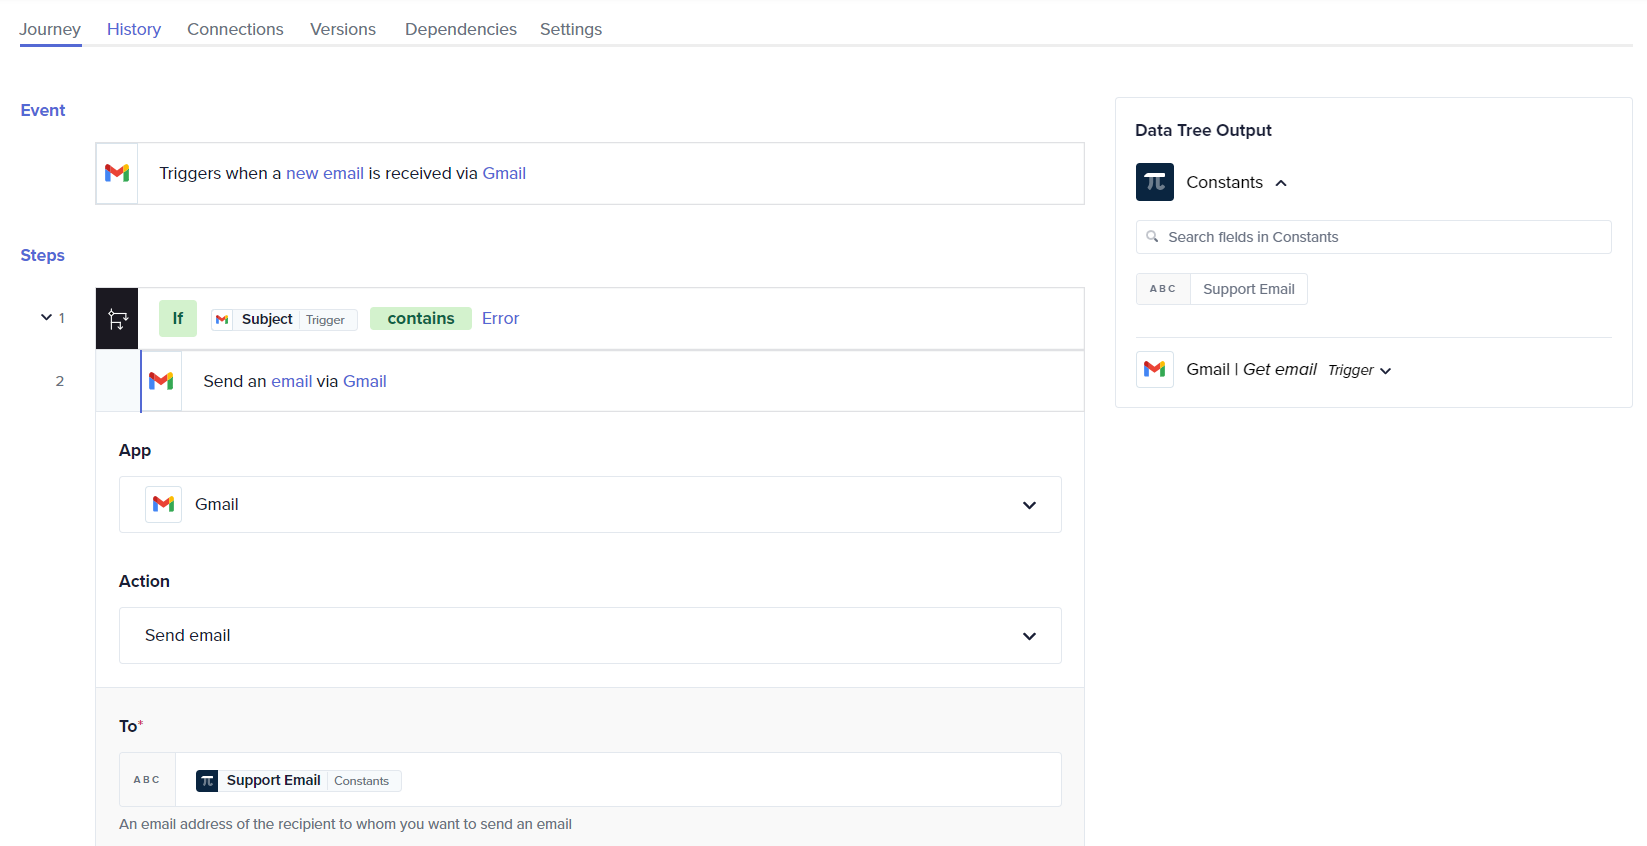
This integration simplifies the setup of actions across various Journeys by providing a consistent value that can be reused effortlessly.
Editing constants
- To edit a constant, click on its name or value to bring up the editable text field.
- Make the necessary changes and press the Enter key to save.
Deleting constants
- To delete a constant, click the delete icon next to the constant you wish to remove.
- Confirm the deletion to remove the constant permanently from your account.

Benefits of using constants
- Better efficiency: Reduces repetitive manual entries, saving time and minimizing errors.
- Consistency: Ensures uniform data usage across multiple Journeys, enhancing reliability in automated processes.
✏️ Tips and recommendations
- Ensure that each constant has a unique name. If a duplicate name is entered, you will be prompted to choose another name.
- Regularly review and update the constants to ensure they remain relevant and accurate, especially if underlying data policies or requirements change.